When I first started learning about horses and their care, I found the array of grooming tools and techniques to be quite overwhelming.
As a beginner taking riding lessons, I experienced different barns with varied expectations – some required me to groom my horse before the lesson, while others already had the horse tacked up and ready.
As I delved deeper into horse care, I realized the importance of understanding the different grooming tools, their purposes, and how to use them effectively.
In this beginner’s guide, we’ll cover the essentials of horse grooming, focusing on the basic tools and techniques you need to know.
As you become more familiar with the process, you’ll gain confidence in grooming horses, even if you’re working with different ones during your lessons.
My aim is to help you feel well-equipped and knowledgeable about horse grooming, ensuring the well-being of both you and the horses you encounter.
Grooming in riding lessons is not only about learning to care for the horse but also checking them for any cuts or injuries, developing a rapport before the lesson, and making sure they are comfortable under the tack to prevent rubs or sores from dirty areas.
Keep in mind that while you might not be able to bond deeply with a specific horse through a few lessons a month, the skills and knowledge you acquire during this time will serve you well in caring for horses throughout your riding journey.
Table Of Contents
- The Essential Grooming Tools
- How to Use Each Grooming Tool
- Order of Grooming Tools
- Grooming Tips and Tricks for Beginners
- Grooming for Riding Lessons
- Building a Relationship with the Horse through Grooming
- Choosing Grooming Products and Tools
- Wrapping Up On Horse Grooming Tools And The Basics Of Grooming Horses

The Essential Grooming Tools
As a riding lesson student, you’ll most likely be using either communal grooming tools provided by the lesson program or the lesson horses’ individual grooming kits.
It’s important to familiarize yourself with the essential grooming tools and their purposes.
In this section, we’ll explore the basic tools that every beginner should know about, and why they’re crucial for horse care.
Quick List of Essential Grooming Tools:
- Hoof Pick
- Curry Comb
- Dandy Brush (Hard Brush)
- Body Brush (Soft Brush)
- Mane and Tail Brush
- Shedding Blade
- Small Towel
- Grooming Tote
Hoof Pick: Keep Hooves Clean and Healthy
The hoof pick is an indispensable tool for maintaining your horse’s hoof health.
It’s used to clean the horse’s hooves of manure, mud, and debris that could cause thrush or other infections if not removed regularly.
Additionally, the hoof pick helps dislodge any rocks or pebbles that may get stuck in the hoof, preventing discomfort and potential injuries.
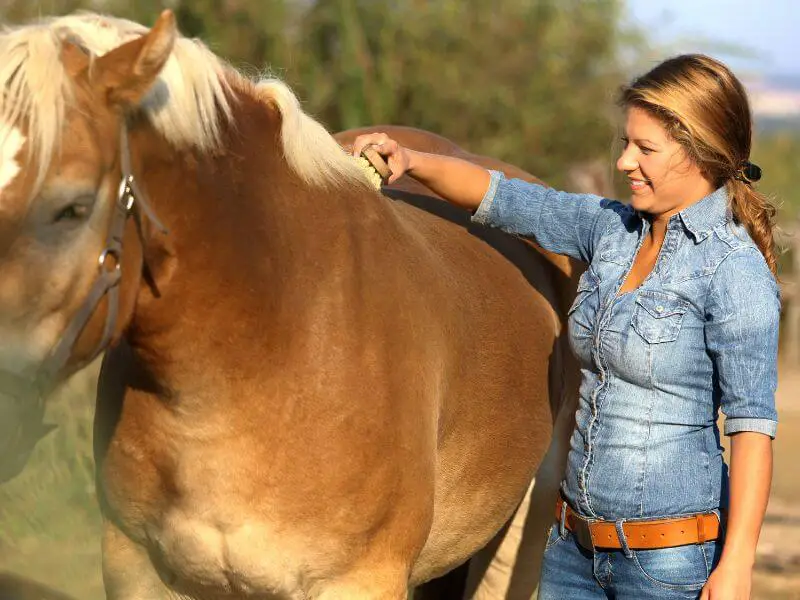
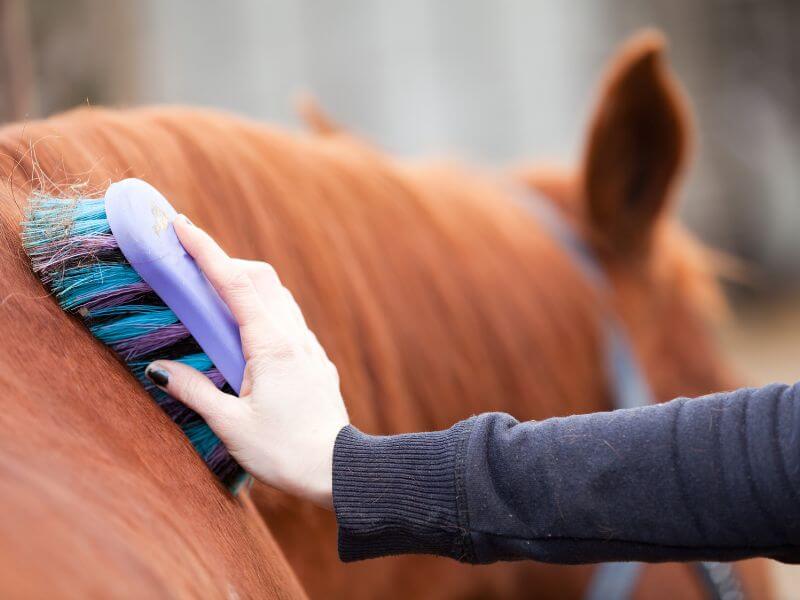
Curry Comb: Loosen Dirt and Improve Circulation
The curry comb is a must-have tool for keeping your horse’s coat clean and healthy. Its primary function is to give the horse a good scratch and massage, loosening up any dander, dirt, or dried mud on the surface.
Using a curry comb also helps to stimulate blood circulation in the horse’s skin, contributing to a healthy coat and a more comfortable grooming experience.
Dandy Brush (Hard Brush): Remove Dirt and Loose Hair
The dandy brush, also known as the hard brush, is essential for brushing off the dander, dirt, and loose hair brought to the surface by the curry comb.
Its long bristles are designed to effectively remove debris from the horse’s coat, keeping it clean and helping to prevent skin irritations or infections.
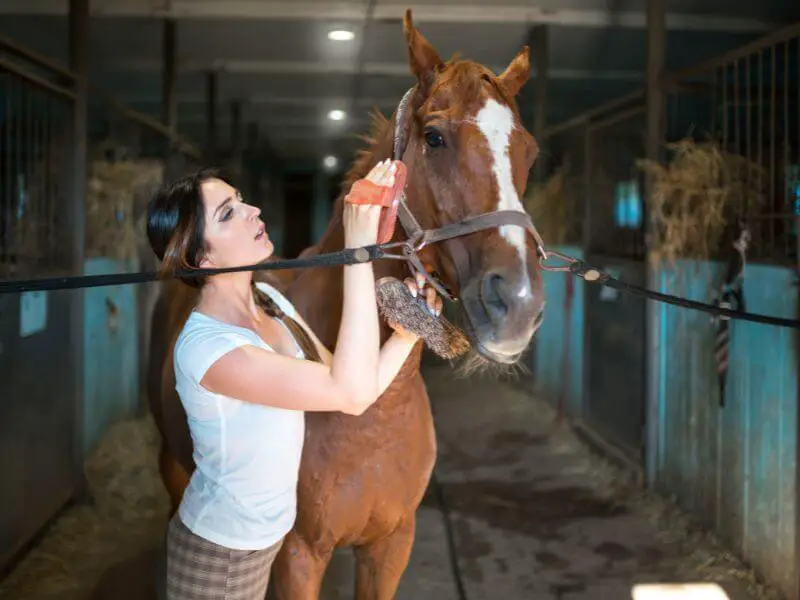
Body Brush (Soft Brush): Finishing Touch for a Shiny Coat
The body brush, or soft brush, is a must-have tool for adding a finishing touch to your horse’s grooming routine.
Its short bristles are designed to remove finer particles from the horse’s coat and add a bit of shine, enhancing its appearance and making your horse look its best.
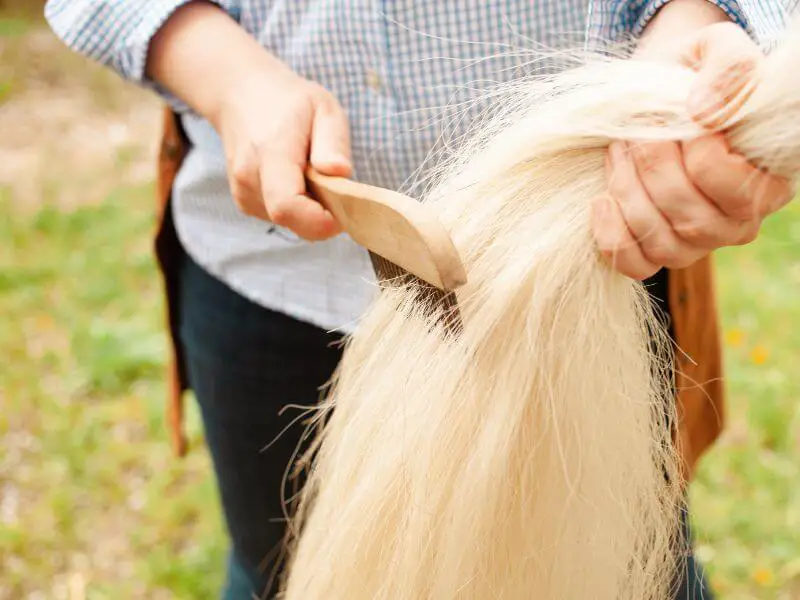
Mane and Tail Brush: Tangle-Free and Healthy Hair
The mane and tail brush is specifically designed for brushing the horse’s mane and tail. It’s important to use this tool gently, as it can pull out hair if not used with care.
Some people prefer to use the dandy brush or their fingers for detangling, but having a dedicated brush for the mane and tail ensures the hair stays tangle-free and healthy.
Shedding Blade: A Versatile Tool for Hair and Brush Cleaning
The shedding blade is a versatile tool that serves multiple purposes in the grooming process. It is primarily used for cleaning out the dandy brush and body brush of excess hair and dirt.
During shedding season, it can be a handy tool for removing the excess shedding hair from the horse more easily.
Exercise caution when using the shedding blade to avoid accidentally injuring the horse.
Small Towel: Final Touch for a Spotless Appearance
A small towel is an essential tool for removing any remaining fine dust particles from the horse and giving the coat an extra shine.
This final touch ensures the horse looks spotless and well-groomed, reflecting the care and attention you’ve put into its appearance.
Grooming Tote: Stay Organized and Efficient
The grooming tote is crucial for holding all the grooming tools in an organized and accessible manner.
It should be easy to carry around and store, allowing you to efficiently manage your tools and streamline your grooming routine.
How to Use Each Grooming Tool
To effectively groom a horse, it’s crucial to know how to use each tool correctly.
In this section, we’ll delve deeper into the proper techniques for using each grooming tool and discuss additional special considerations for different areas of the horse.
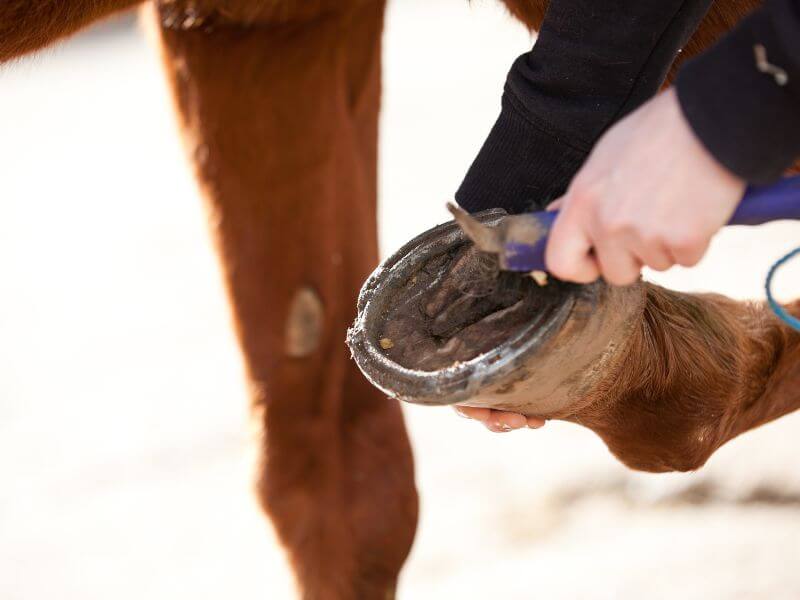
Hoof Pick: Cleaning from Heel to Toe
Using the hoof pick is essential for maintaining healthy hooves. Start by holding the horse’s hoof with one hand and the pick in the other.
Beginning at the heel, work your way to the toe, using the pick end to remove debris. Be careful to avoid the sensitive frog, the triangle-shaped structure in the middle of the hoof.
Focus on digging into the grooves on either side of the frog.
If your hoof pick has a brush end, use it to scrub off any remaining debris on the frog and around the hoof. Regular hoof cleaning reduces the risk of infections and promotes overall hoof health.
Curry Comb: Loosening Dirt and Dander
When using the curry comb, apply gentle circular or back-and-forth motions to loosen up dirt, dander, and loose hair.
Be cautious not to use the curry comb on the horse’s legs, where the tendons and ligaments are, or on sensitive areas such as the head and groin.
Adjust the pressure you apply with the curry comb according to the horse’s sensitivity and preference to ensure a comfortable grooming experience.
Dandy Brush: Flicking Away Dirt and Loose Hair
To use the dandy brush effectively, apply short flicking strokes in the direction of hair growth.
This technique will help flick off the dirt and dander you previously loosened with the curry comb, leaving your horse’s coat clean and free of debris.
Body Brush (Soft Brush): Smooth Strokes for a Fine Finish
With the body brush, use longer strokes in the direction of hair growth to remove fine dust and add shine to the horse’s coat.
The body brush is also great for stimulating the natural oils in the horse’s skin, which promotes a healthy and glossy appearance.
Mane and Tail Brush: Gentle and Patient Detangling
When using the mane and tail brush, start at the bottom and work your way up, gently removing tangles.
If you encounter any knots, use your fingers or a softer brush to detangle them without pulling out too much hair.
Patience is key when working with the mane and tail to avoid causing discomfort or hair loss.
Shedding Blade: Cleaning Brushes and Removing Excess Hair
The shedding blade can be used to clean your dandy and body brushes by rubbing them against the blade’s teeth.
When using the shedding blade on a horse, be gentle, and avoid pressing too hard or using it on bony or sensitive areas. Brush in the direction of hair growth.
The side without teeth can be used as a sweat scraper after rinsing the horse off on hot days.
Towel: Polishing for a Shiny Finish
To use the towel, simply rub the horse in the direction of hair growth to add more shine and remove any remaining dust.
The towel is also useful for wiping down the horse’s face, ears, and muzzle, where brushes may be too harsh.
Grooming Tote: Keeping Tools Clean and Organized
When storing your grooming tools in the tote, make sure it’s free of excess hair and dirt.
This will keep the tools cleaner and more organized. Regularly cleaning your grooming tote and tools helps prevent the spread of bacteria and ensures a more hygienic grooming experience.
Order of Grooming Tools
When grooming your horse, it’s important to know the order in which to use the various grooming tools for the best results.
The sequence may vary depending on the season and the horse’s condition.
However, there are some general guidelines and personal preferences, like the ones I’m sharing below, that you can follow to ensure the horse’s comfort and well-being.
Keep in mind that you can adapt the grooming routine to suit your needs and the specific horse you’re working with.
General Order of Grooming Tools
The most important order for using grooming tools is:
- Curry Comb
- Dandy Brush
- Body Brush
- Hoof Pick (before or after the brushes)
This sequence makes sense as the curry comb loosens dirt, the dandy brush removes most debris, and the body brush takes care of finer particles.
The shedding blade, hand towel, and mane and tail brush can be used as needed depending on the horse’s condition and the season.
Seasonal Grooming Preferences
Based on my personal experience, I’ve found the following grooming order works best for different seasons and horse conditions:
Shedding Season
- Shedding Blade
- Curry Comb
- Shedding Blade
- Dandy Brush
- Mane and Tail Brush (only if needed)
- Body Brush
- Hoof Pick
During shedding season, using the shedding blade twice with currying in between helps to remove as much hair as possible.
I prefer not to use the towel in this case, as it would quickly become covered in hair and lose its effectiveness.
Mud Season
- Curry Comb
- Dandy Brush
- Mane and Tail Brush
- Body Brush
- Brush mud off legs and hooves
- Hoof Pick
In mud season, I prioritize removing mud and dirt from the horse’s body, legs, and hooves before picking out the hooves to maintain cleanliness and prevent infections.
I avoid using the towel during this season, as it would become dirty quickly and require constant washing.
Cold Weather
- Hoof Pick
- Curry Comb
- Dandy Brush
- Body Brush
- Mane and Tail Brush (only if needed)
In cold weather, horses may be wearing blankets when brought in, so I start with the hooves and address the mane and tail last, if needed.
This approach allows me to groom the horse while keeping them warm and comfortable.
Hot to Fair Weather
- Curry Comb
- Dandy Brush
- Body Brush
- Mane and Tail Brush
- Towel
- Hoof Pick
During hot to fair weather, I follow a more standard grooming routine, ending with the towel for a final touch-up and added shine.
This routine keeps the horse clean and comfortable during warmer months.
Why is this order important for the horse’s comfort and well-being?
Adapting your grooming routine to the season and the horse’s condition ensures that you’re addressing the specific needs of the horse at any given time.
By following these guidelines and adjusting your grooming routine according to the horse’s needs and the season, you’ll contribute to the horse’s overall comfort and well-being, ultimately making your grooming sessions more effective and enjoyable.
Keep in mind that these are my personal preferences, and you should feel free to adapt your grooming routine to suit your needs and the specific horse you’re working with.
The key is to observe your horse’s reactions and comfort level and adjust your approach accordingly.

Grooming Tips and Tricks for Beginners
In this section, we’ll share some practical insights and helpful tips to make the grooming process easier and more enjoyable for both you and the horse.
These tips are particularly useful for those who have just started taking riding lessons and are learning about grooming.
They will ensure that the horse remains comfortable throughout the grooming session while also providing you with some new techniques to make your grooming routine more efficient.
1. Let the Horse Sniff the Tool
As a personal practice, I like to let the horse sniff the grooming tool before using it.
This helps the horse know what I am going to do next and shows consideration for their comfort.
By doing this, you can develop trust and rapport with the horse, making the grooming process more enjoyable for both of you.
2. Find the Horse’s Itchy Spots
Some horses have itchy spots that are easier to find than others.
When you scratch their itchy spot, they may raise their head, wiggle their upper lip, or try to groom you back.
Pay attention to these reactions to make the grooming experience more enjoyable for the horse and build a stronger bond with them.
3. Be Mindful of Sensitive Areas
Different horses have different sensitive areas, such as the flank, belly, or around their ears.
It’s essential to be gentle and adjust your brushing technique accordingly to avoid causing discomfort.
Horses may react to rough handling in sensitive areas by swishing their tail, pinning their ears back, or moving away.
By paying close attention to the horse’s body language and reactions, you can ensure their comfort during grooming.
5. Grooming Different Coat Types
Depending on the horse’s breed and coat type, you may need to adjust your grooming techniques.
Horses with shorter, finer coats may need gentler pressure and softer brushes to avoid causing irritation.
Adjust your grooming tools and approach to accommodate the specific needs of each horse’s coat type.
6. Seasonal Changes
As the seasons change, so do the grooming needs of your horse.
Be prepared to adjust your grooming routine to accommodate the shedding of winter coats in the spring, and the growth of a new coat in the fall.
During muddy seasons, be prepared to spend extra time removing dried mud and dirt from the horse’s coat and legs.
By staying aware of seasonal changes, you can provide the best care for your horse year-round.
7. Quick Cleaning of Grooming Tools
For lesson students, it’s important to do a basic quick cleaning of the grooming tools after use to be considerate of the next person who will use the brushes for grooming.
Remove dirt and hair from the brushes and dump them out of the grooming tote to keep the tools clean and ready for the next use.
8. Take Your Time and Arrive Early
By arriving early before your lesson, you’ll have plenty of time to do a thorough job grooming your horse.
This also gives you the opportunity to build rapport with the horse and address any issues you may notice, such as an injury or cut.
Taking your time helps create a more enjoyable and comfortable experience for both you and the horse.
9. Safety First
Always approach the horse from the side and announce your presence to avoid startling them.
Be mindful of your surroundings and remember to never stand directly in front of or behind the horse.
Also, avoid going under the horse’s belly.
If you need to walk behind the horse, place your hand on their hindquarters, stay close, and keep your hand on them as you slide across to the other side.
Alternatively, you can walk far back out of kicking range.
10. Picking Up Hoof Of Reluctant Horse
When dealing with a reluctant horse that doesn’t want to lift its hoof, it’s essential to approach the situation with patience and understanding.
Here’s a helpful tip to encourage your horse to pick up its hoof:
- Stand beside your horse, facing its tail, and place your hand on its shoulder or barrel to establish contact and reassure the horse of your presence.
- Gently run your hand down the horse’s leg, applying slight pressure as you go. This motion cues the horse that you want it to lift its hoof.
- If the horse doesn’t respond, apply a bit more pressure with your hand or gently squeeze the tendons above the fetlock joint (the joint just above the hoof).
- If the horse still doesn’t lift its hoof, gently squeeze the chestnut. This action may provide the extra encouragement needed for your horse to lift its hoof.
- As soon as the horse lifts its hoof, support it with your other hand, making sure to hold it firmly but gently.
- Reward your horse with praise or a gentle pat to reinforce the positive behavior.
Remember to be patient and persistent when working with a reluctant horse.
Each horse is unique, and it may take some time for them to become comfortable with the process.
Grooming for Riding Lessons
The Importance of Grooming Before Riding Lessons
Grooming before a riding lesson is not only a great way to start building a connection with the horse but also an essential part of ensuring the horse’s comfort and safety.
It gives you the opportunity to check over the horse for any cuts or injuries that may need attention, as well as to assess the horse’s mood and overall demeanor.
Additionally, making sure the horse is clean under the tack helps to prevent rubs and sores, which can result from dirt and sweat getting trapped between the tack and the horse’s skin.
Quick Grooming Routines for Riding Lessons
While it’s always best to arrive early and give your lesson horse a full and thorough grooming, there may be times when you’re in a hurry and need to streamline the process.
In these cases, focusing on the essentials can still help you prepare the horse effectively for the lesson.
Here’s a quick grooming routine you can follow:
- Curry Comb: Start by using a curry comb to loosen dirt and hair on the horse’s coat. Focus on the areas where the tack will be placed, such as the saddle and girth areas, as well as the bridle path.
- Dandy Brush: Next, use a dandy brush to remove the loosened dirt and hair. Pay special attention to the areas under the tack, ensuring they’re clean and free of any debris that could cause discomfort or irritation during the lesson.
- Hoof Pick: Finally, clean the horse’s hooves using a hoof pick. A time-saving trick learned from working with off-the-track Thoroughbreds (OTTBs) is to pick out the hooves from one side of the horse, allowing you to quickly and efficiently clean all four hooves without moving around too much.
Building a Relationship with the Horse through Grooming
Developing Rapport through Grooming
While forming a deep bond with a horse may not be feasible in just a few lessons, grooming can still help you develop a rapport with different horses.
By spending time grooming and handling the horse, you can put them in a calmer state of mind, establish trust, and work on communication before ever getting in the saddle.
Grooming allows the horse to become familiar with you and helps them understand who will be on their back.
It also gives you a chance to observe the horse’s personality and learn how they may behave under the saddle.
This interaction on the ground can make a difference when it comes to your riding experience.
Benefits of Establishing a Connection through Grooming
There are several advantages to fostering a connection with the horse through grooming, including:
Improved Mood and Cooperation
A comforting grooming session can put the horse in a better mood, which may lead to improved cooperation during your riding lesson.
This can make your time together more enjoyable and productive.
Enhanced Communication
By spending time grooming the horse, you create opportunities to practice non-verbal communication and better understand the horse’s cues.
This increased understanding can translate to a more harmonious riding experience, as the horse may respond better to your instructions.
Increased Confidence for Both Horse and Rider
When you take the time to groom a horse before riding, both you and the horse can feel more confident in each other.
The horse will be more at ease with you, while you will have a better understanding of the horse’s temperament and behavior.
Safer Riding Experience
A well-groomed horse is less likely to have painful or irritating issues under the tack, such as rubbed sores or dirt causing discomfort.
This can result in a more pleasant ride for both you and the horse, reducing the chances of accidents or unexpected behaviors.
Building Empathy and Horse Care Skills
Regularly grooming a horse teaches you to observe and understand their needs, helping you develop empathy and essential horse care skills.
This knowledge will benefit you as you progress in your riding journey, regardless of the specific horse you work with.
Overall, taking the time to groom a horse before riding lessons can lead to numerous benefits, enhancing your connection with the horse and improving your overall riding experience.
Choosing Grooming Products and Tools
When it comes to selecting the right grooming products and tools for your horse, it’s essential to consider the specific needs of the horse and your own preferences.
In this section, I’ll share some of my personal recommendations and preferences for various grooming tools, which may be helpful for you as well.
Grooming Kits
Grooming kits can be a convenient option for beginners, as they often come with most of the essential tools you’ll need.
However, keep in mind that most kits do not include a hand towel or shedding blade. These items can be easily purchased separately at a tack shop or online.
When buying your first grooming kit, you can choose between purchasing a pre-packaged kit or buying the tools separately.
While buying a kit can be more straightforward, I personally prefer to buy the tools individually so I can pick and choose the ones I like best.
One of my favorite grooming kits is the OSTER Horse Grooming Kit.
This kit contains a good selection of essential grooming tools and can be a great starting point for those who prefer to purchase a pre-packaged kit.
Curry Combs
I have mostly owned sensitive thoroughbreds, so these are the ones I have liked for using on them.
For these kinds of horse’s it’s a good idea to choose curry combs that cater to their delicate skin.
One option I recommend is the Jelly Scrubber, which has two sides: one fine and soft side for gentle grooming, and the other side featuring either massage rollers or a thicker, tougher curry comb.
The soft side is excellent for use on sensitive horses.
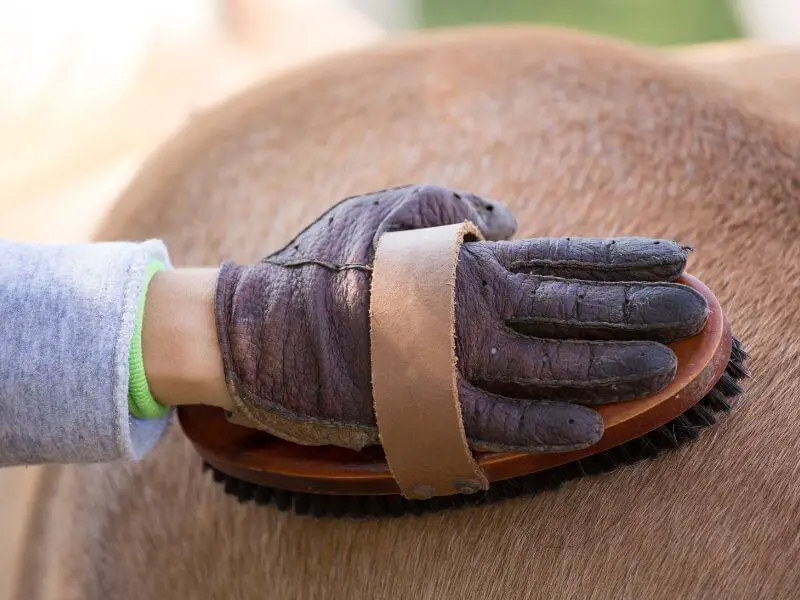
Another popular choice is the Hands On Grooming Gloves.
These gloves allow you to groom your horse with a more natural feel, letting you get into hard-to-reach areas and providing a more comfortable experience for the horse.
Dandy and Body Brushes
When selecting a dandy brush, I prefer one with medium stiffness and longer bristles to make it easier to flick dirt off the horse.
For the body brush, I like one with short, soft bristles that are gentle enough to use on the horse’s face and legs.
Mane and Tail Brushes
To detangle manes and tails without causing excessive hair loss, I recommend using a human Wet Brush.
These brushes are designed to untangle hair with minimal damage and can be a great tool for horse grooming as well.
Shedding Blades
For shedding blades, you can choose between a spiral shedding blade or a regular shedding blade. While both types are effective, the spiral shedding blade can be easier to use for cleaning brushes.
The regular shedding blade can also double as a sweat scraper on the non-teeth side, making it a versatile choice.
Finishing Touches
For adding a finishing touch to your horse’s coat, a simple dish towel can do the trick.
However, you may also want to experiment with a microfiber cloth to see if it provides extra shine, although I haven’t tried this option myself.
Grooming Totes
My preference for a grooming tote is a plain plastic one with a handle in the middle, in a bright color like pink, turquoise, or purple.
These totes offer ample storage space and are stable and sturdy.
However, if you prefer more traditional colors, there are plenty of options available to suit your taste.
Remember, the key to choosing the best grooming products and tools is to consider your horse’s specific needs and your own preferences.
Experiment with different options and find the tools that work best for you and your horse.
Wrapping Up On Horse Grooming Tools And The Basics Of Grooming Horses
Proper grooming plays a crucial role in maintaining your horse’s health, well-being, and appearance.
As a rider taking lessons or preparing to buy your first horse grooming kit, understanding the importance of grooming is essential for both horse care and rider safety.
Grooming not only keeps your horse clean and comfortable, but also allows you to identify any potential health issues or injuries before they become more severe.
It also helps you develop a rapport with the horse and ensures that the tack is correctly positioned and secure, preventing rubs or sores that could hinder your riding experience.
As you continue your journey in horse care, don’t hesitate to ask questions and seek guidance from experienced riders and trainers.
There’s always more to learn, and growing in your knowledge and skills will only enhance your relationship with horses and contribute to their overall well-being.
Remember, every horse is unique, and finding the right grooming tools and techniques may take some trial and error.
Be patient, be observant, and never stop learning. Your dedication to proper horse care will not only benefit your equine friends but also provide a solid foundation for a successful and enjoyable riding experience.
Now you have a better idea of the essential grooming tools you need to keep your horse looking and feeling its best!
Cheers, Kacey
P.S. Did you like this article? Gallop over to: