As the last bits of winter melt away, it’s time for some 🌷 spring cleaning! It’s that perfect moment to freshen up our spaces—and that includes where our horses live and play.
Whether you’re looking after a horse on a cozy little farm or they’re living it up in a busy stable, we’ve all got some cleaning to tackle.
And to make your spring cleaning even easier, I’ve created a downloadable checklist you can access by joining our email list which you’ll find toward the bottom titled “horse owner spring cleaning checklist!”
So, let’s gear up, get our gloves on, and dive into a spring cleaning spree that’s perfect for both our pasture-bound buddies and those who also stay in stables!

Pasture And Paddocks: Spring Cleaning for the Great Outdoors
Since the horse Muffy, I lease is kept outdoors, let’s kick things off with the outdoor areas.
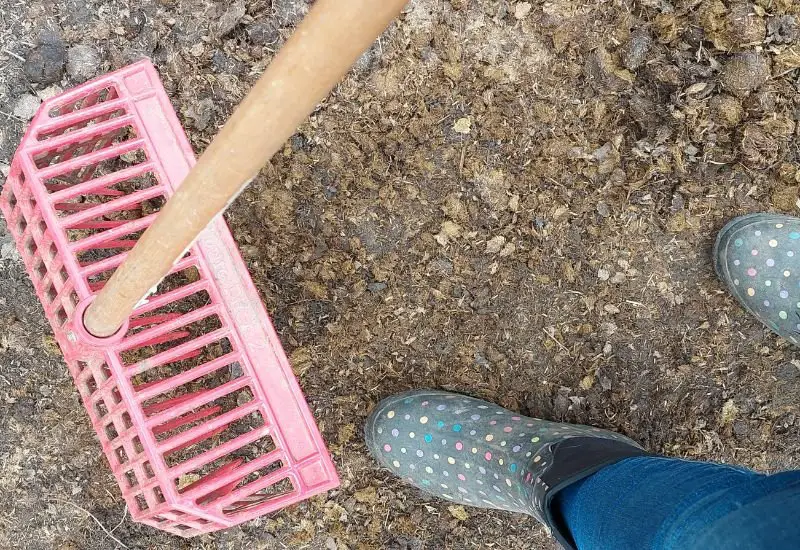
You will see these photos I took today. It is more of the befores. Their is a lot is going on, fencing is getting moved around, an outdoor arena is being built. As well as a wooden run-in shed will be on the side of the barn. The barn/tack room/feed room is a clutter mess in the pictures. Revamping and organizing is planned.
Also you may think that the image above is a narrow space the horses are in… just want to address this. The horses have a sort of paddock paradise system. This is like a trail loop that encourages the horses to move around more than if they were just out in a paddock or pasture. When it is connected it goes around the arena, out on some trails in the woods and up towards the house. The horses have a shelterlogic shed for shelter at the moment and don’t use the stalls, but they are their if needed.
So back to cleaning!
Here’s how we can get our outdoor spaces clean and comfortable for our horses:
Fence Patrol: Keeping Boundaries Secure
🌿 Time to focus on a super important task—Fence Patrol! Yep, those boundaries we set up are more than just lines on the ground; they’re the first line of defense for our equine pals. So, when spring rolls in, it’s crucial we make sure everything’s secure to keep our special horsey friends safe and sound.
As you stroll along the fence line, here’s what to keep your eyes peeled for:
Obvious Damage: Check for any broken boards, loose wires, or nails sticking out—yikes! These could hurt your horse, and we definitely don’t want that. Pay extra attention to the busy spots like gates and corners where your horse might hang out or try to break free.
Vegetation Watch: Overgrown branches and weeds? Not only do they make fences weak, but they can also mess with electric fences, causing shorts. Trim those troublemakers back regularly to keep the view clear and prevent your horse from getting tangled up. Oh, and watch out for nasties like poison ivy or oak that could irritate both your and your horse’s skin.
Gate Check: Make sure those gate latches are doing their job right. If a gate doesn’t close properly, you might find yourself playing a game of “catch the escapee horse”—not fun!
Post Check: Have a good look at the fence posts, especially around corners and gates where there’s a lot of stress. Check for signs of rot or instability. Those posts need to be strong and deeply rooted, so they stand up to the job.
Keeping these things in check means a safer pasture for everyone. Let’s make it happen!

Additional Fence Repair Tips
Let’s talk about how to keep your horse fences in great shape, because a well-maintained fence keeps our horses safe and gives us peace of mind. Here’s a quick rundown on what you might need to do depending on the type of fence you have around your paddock:
Wooden fences: Start by replacing any broken boards you spot. Then, grab a screwdriver or a hammer to tighten up those loose nails or screws. Sometimes, the posts get old and rotted, and when they do, it’s time to either reinforce them or put in new ones. Keeping these fences in good shape really helps keep everything secure and tidy.
Wire fences: Check out the wires first—if any are broken, you’ll need to repair or splice them to make sure they’re continuous and strong. Make sure the wires are taut and not sagging anywhere. Loose staples or fasteners? Tighten those up so your fence stays well-supported.
Electric fences: These need a bit of special attention. Make sure there’s no debris causing shorts along the fence line. It’s crucial to check that the grounding is done right to avoid any mishaps. And always, always make sure the voltage is up to snuff—at least 3000V—to keep it effective but safe for the horses.
Remember, keeping your fences in top shape isn’t just a chore—it’s a way to ensure our horses are happy and secure. Let’s keep up the good work!
Debris Removal: Treasure Hunt for Hazards
After a long winter, our pastures can look a bit like a treasure map, dotted with hidden hazards rather than gold. Let’s turn into detectives and clear out anything that could be a risk:
Fallen branches: These are more than just an eyesore; they’re tripping hazards that can catch a hoof or a boot. Scoop them up and clear the way.
Rocks and stones: After the thaw, these little troublemakers can pop up out of nowhere. They’re especially risky in soggy ground where hooves are more vulnerable. Removing them can prevent painful hoof injuries.
Trash and debris: It’s surprising what can end up in our fields. From plastic bags to random bits of garbage, these items are not just ugly—they can be dangerous if our curious horses decide to take a nibble.
Safety tip: Always slap on a pair of sturdy gloves for this job. Not only will they protect you from sharp objects and icky stuff, but they’ll help you handle everything safely as you dispose of it properly. Let’s keep our pastures clean and safe for everyone!
Mud Management: Conquering The Muck
Spring brings rain and with it, the inevitable battle against mud, especially around gates and water troughs. But fear not! There are several savvy strategies we can use to tackle these messy areas effectively:
Improve Drainage
Grading and Sloping: Make sure the ground slopes away from high-traffic areas like gates, barn entrances, and water troughs to prevent water from pooling. Re-grading or adding some fill dirt can help create the right slope to guide water away from these areas.
Drainage Solutions:
- Swales and Ditches: Installing shallow ditches or swales can be a game-changer. They help divert water runoff away from your paddocks and barn, directing it downhill.
- French Drains: For areas where mud just won’t quit, a French drain might be the ticket. This system uses a perforated pipe surrounded by gravel, buried underground, to capture and redirect excess water.
Stabilize the Footing
Geotextile Fabric and Gravel: This combo is your long-term ally against mud. Lay down geotextile fabric first to keep gravel from sinking into the mud, then add a thick layer of crushed rock or gravel (6-8 inches), topped with finer gravel or limestone dust (3-4 inches) for a stable, well-draining surface.
Alternative Footing Materials:
- Sand: It’s great for drainage but can shift underfoot if too deep, so it’s best for areas with naturally good drainage and less foot traffic.
- Wood Chips or Straw: These can offer a quick fix for muddy spots. Spread a generous layer over muddy patches for temporary relief, but be ready to replace them as they decompose and blend into the mud.
Manage High-Traffic Areas
Water Troughs: To keep things tidy around your water troughs, consider laying rubber mats or building a gravel pad around them. This helps prevent mud and provides stable footing. Also, ensure any overflow is directed away from the trough.
Gates: Gate areas are notorious for turning into mud pits. A layer of gravel or stone dust here can significantly improve the situation by enhancing drainage and stability.
Prevent Mud Formation
Limit Turnout: In wet conditions, try to keep horses off especially muddy patches to let the area dry and recover.
Grazing Management: Avoid overgrazing. It weakens the pasture and exacerbates mud issues. Try rotational grazing or use a grazing muzzle to help control how much your horses eat.
Sacrifice Areas: Setting up a designated dry lot or “sacrifice area” for turnout during rainy seasons can save your pastures from turning into a mud disaster.
With a bit of planning and effort, mud management can greatly improve the health and happiness of our horses, and keep our pastures and paddocks in good shape!

Tack TLC: Spring Cleaning for Leather Goods
Whether your tack hangs in a neat little tack room or tucks away in a corner of the barn, spring is the ideal time to give your leather gear some extra attention. After all, well-maintained tack is not only safer to use but also lasts longer.
Leather Care: From Grime To Shine
Leather tack is an investment, and like any good investment, it needs proper care to keep it in top condition. Here’s how to bring out the best in your leather goods this spring:
1. Cleaning
Start with a gentle wipe down: Using a soft cloth and some warm water, gently remove any dust and loose dirt from your leather items.
Glycerine soap for a deep clean: To really get into the nitty-gritty and help maintain the leather’s natural oils, opt for glycerine saddle soap. Use a damp sponge or cloth to apply the soap, work it into a lather, and gently wipe away the residue with a clean, damp cloth.
Tackle stubborn grime: For those tough spots or ingrained dirt, consider a specialized leather cleaner like Fiebing’s Saddle Soap, Lexol Leather Cleaner, or Effax Leather Combi. Remember, always do a spot test on a small, hidden area first to ensure it doesn’t alter the leather’s color or texture.
2. Conditioning
- Choose the right conditioner: Look for a leather conditioner made with natural oils, such as neatsfoot oil, mink oil, or beeswax. Steer clear of products with petroleum or mineral oils, as they can degrade leather over time. Brands like Passier Lederbalsam, Effax Leather Balm, and Leather Honey come highly recommended.
- Apply regularly: Depending on your climate and how often you use your tack, you might need to condition your leather every few weeks in dry climates or perhaps only every few months in more humid settings.
- Neatsfoot oil for extra softening: If your leather feels stiff, plain neatsfoot oil can help soften it up. Use a dauber brush to apply the oil in small, circular motions, allowing the leather to fully absorb it before you saddle up again.
3. Weather-Specific Care
Hot and dry climates: In these conditions, leather can dry out and crack more easily. Ramp up your conditioning routine and consider using a leather oil for extra moisture.
Humid climates: Watch out for mold and mildew. Always dry your tack thoroughly before storing, and use a conditioner with mold-inhibiting properties to keep fungi at bay.
Bonus tip: To further protect your leather, store it in a cool, dry place away from direct sunlight. Saddle covers and bridle bags are great for keeping dust and scratches off your gear.
By following these steps for leather care, including the use of glycerine soap and neatsfoot oil where needed, your tack will remain supple, strong, and serviceable for many rides to come.
Storage and Organization: Taming the Tack Room Chaos
Spring cleaning isn’t just for our homes; it’s also the perfect time to whip our tack rooms into shape. These spaces can easily turn into black holes of clutter, so let’s take this chance to restore order and ensure our gear is stored correctly, thus extending its life.
Declutter and Donate
Start Fresh: Begin by sorting through your tack. Remove any items you no longer use or that are beyond repair. This decluttering step can make a huge difference.
Give Back: Consider donating usable tack and equipment to therapeutic riding programs, local pony clubs, or other equestrian organizations. This not only clears your space but supports others in the equestrian community.
Invest in Storage Solutions
Saddle Racks: Keep saddles off the floor to maintain their shape and prevent damage. Saddle racks are essential for avoiding warping of the saddle’s tree and keeping the leather in good condition.
Bridle Hooks: Use dedicated hooks to hang bridles and avoid tangling. This simple step helps preserve the leather’s integrity and keeps your tack room tidy.
Shelves and Bins: Organize smaller items like grooming supplies, first-aid kits, and other essentials on shelves or in labeled bins. This way, everything is easy to find and in its place.
Storage Tips for Different Tack
Leather Tack:
- Clean and condition leather goods before storing.
- Keep leather items in a cool, dry spot away from direct sunlight to prevent drying and fading.
- Use breathable covers or dust bags to shield your tack from dust and moisture. Leather needs air, so avoid sealing it in airtight containers.
- Stuff saddles with acid-free tissue paper to help them keep their shape.
Metal Fittings:
- Polish metal fittings before storage to avoid rust and corrosion.
- Store metal items like bits separately from leather to avoid stains or tarnish on your leather gear.
Fabric Items:
- Wash and fully dry fabric items like saddle pads and blankets before storage to ward off mildew or mold.
- Store these items in a cool, dry area to maintain their condition.
Additional Tips:
Climate-Controlled Storage: In humid climates or for particularly valuable tack, consider a dehumidifier or climate-controlled storage to provide extra protection.
Regular Inspection: Make it a habit to check your stored tack regularly for any signs of damage, wear, or mold. Early detection means you can address issues before they worsen.
By implementing these organization and storage strategies, your tack room will not only look great but function efficiently, making it easier to enjoy your time with your horses and ensuring your equipment remains in prime condition.

3. Springtime Shine: Grooming Your Horse
As the days get longer and the air gets warmer, it’s time for our horses to say goodbye to their winter coats. Let’s help them shed that extra fur and get their skin glowing for the sunny days ahead.
Shedding Season Solutions: Taming The Furry Blizzard
Spring shedding season means we’re about to face a furry blizzard, but with the right tools and techniques, we can help our horses transition smoothly into their sleek summer coats.
Tools of the Trade
Curry Comb: Start with a rubber curry comb to loosen up dirt, dander, and dead hair. Use circular motions to stimulate the skin and bring all that loose hair to the surface.
Shedding Blade: This tool is fantastic for tackling large amounts of hair, especially on horses with thicker coats. Remember to use short, gentle strokes that follow the direction of the hair growth to avoid irritating the skin.
Grooming Mitt: For the sensitive spots like the face and legs, switch to a grooming mitt or glove. The soft rubber nubs are perfect for catching loose hair without causing discomfort.
Brushes: Each type of brush has a specific role:
- Dandy Brush: Ideal for flicking away surface dust and dirt.
- Body Brush: Use this to help distribute natural oils across the skin, enhancing the coat’s shine.
- Finishing Brush: Perfect for giving your horse that final polish and gleam.
Vacuum: If you’re dealing with a particularly thick winter coat, a shop vac can be your best friend. It quickly sucks up all the loose hair, making cleanup a breeze.
Additional Tips
Grooming Gloves/Fingers: Sometimes, the simplest tools—your hands—are among the most effective. Slightly dampen your hands and gently run them over your horse’s coat to pull loose hairs away.
Bathing: Giving your horse a bath with a gentle equine shampoo can loosen up stubborn dirt and hair, making the rest of the grooming process smoother and more effective.
Shedding Supplements: To support a healthy skin and coat from the inside out, consider adding a shedding supplement to your horse’s diet. These often contain omega-3 fatty acids, which can enhance coat health.
Mind the Location: Try to avoid grooming near water troughs or feed areas, especially on breezy days. Loose hairs can easily drift and contaminate your horse’s food and water.
Using these tools and tips, you can help your horse shed off the old winter coat and bring in a healthy, shiny new layer. Remember, the key is patience and gentleness—enjoy this time bonding with your horse as you help them prepare for the warmer weather ahead!

Spring Health Check: Head To Hoof
Spring is not just a time for cleaning and grooming; it’s also the perfect opportunity to conduct a thorough health check to make sure your horse is in tip-top shape for the active months ahead. Here’s a comprehensive guide on what to look for during your spring horse health check:
Skin and Coat
General condition: Check your horse’s skin for any signs of irritation, rain rot, insect bites, or allergies. Spring allergens can trigger skin reactions that may need attention.
Shedding: If your horse’s coat is dull or they’re shedding excessively, it might signal a health issue. Ensure they’re getting balanced nutrition, and consider adding an omega-3 fatty acid supplement to enhance skin and coat health.
Hooves
Check for abnormalities: Look out for cracks, thrush, abscesses, or any signs of lameness. Any of these can affect your horse’s mobility and comfort.
Schedule a farrier visit: Keeping up with regular farrier visits is crucial. Depending on how active your horse is and how fast their hooves grow, you may need to adjust the frequency of trims or shoeing in the spring and summer.
Teeth
Schedule a dental check: Horses need regular dental care; their teeth continually erupt and can develop sharp edges that cause discomfort and interfere with feeding. A check every six to twelve months by a qualified equine dentist is advisable.
Parasite Control
Develop a deworming plan: Work with your veterinarian to create a deworming schedule based on fecal egg counts and your horse’s specific needs. Spring, with its warmer weather and lush pastures, can see an uptick in parasite activity.
Vaccinations
Stay up-to-date: Make sure your horse’s vaccinations are current. Core vaccines are crucial for diseases like tetanus and equine influenza. Your vet can provide the best advice tailored to your horse’s environment and lifestyle.
Additional Checks
Body condition: Evaluate your horse’s body condition and weight. As pastures grow richer in spring, some horses might start to gain excess weight. Adjust their diet accordingly to avoid weight-related health issues.
Eyes and ears: Look for any discharge, irritation, or unusual smells, which could indicate infections or other health problems.
Being proactive with these checks can help you catch potential health issues early, ensuring your horse stays healthy and happy through the spring and into the summer. Always consult your veterinarian if you notice any troubling changes in your horse’s condition or behavior.

Stables: Spring Cleaning For Barns And Stalls
Whether your horse lives at a boarding facility or you manage your own private barn, maintaining a clean and organized stable is crucial for the health of both horses and their human caretakers. Here’s a thorough guide to conducting a deep clean this spring:
Deep Cleaning: Down and Dirty
Spring cleaning is the perfect opportunity to really dig into those corners and eliminate the buildup of dust, debris, and pathogens from your stable. Here’s a detailed plan to get your stable sparkling:
Step 1: Strip Stalls
Remove Everything: Clear out all bedding, feed and water buckets, hay nets, and other equipment. This will give you full access to all surfaces that need cleaning.
Sweep and Scrub: Start with a thorough sweep to remove all dust, cobwebs, and loose debris. Follow up by scrubbing the floors and walls with a detergent solution to tackle grime and organic material. Don’t overlook the corners and crevices where dirt and bacteria tend to accumulate.
Disinfect: Use a horse-safe disinfectant, such as accelerated hydrogen peroxide or potassium peroxymonosulfate. Follow the manufacturer’s guidelines for proper dilution and contact time. Apply the disinfectant to all surfaces, including walls, floors, doors, and window sills, and let it sit long enough to be effective.
Step 2: Dust and De-cobweb
Cobweb Removal: Cobwebs aren’t just unsightly; they’re also a fire hazard. Remove them from rafters, light fixtures, and ventilation systems using a broom with an extended handle or a vacuum with a hose attachment to get into those high, hard-to-reach places.
Step 3: Clean and Disinfect Equipment
Water Buckets and Feed Tubs: It’s essential to regularly empty, scrub, and disinfect all feeding and drinking containers to prevent bacterial growth and ensure your horse has access to clean food and water. Let everything air dry thoroughly before you refill.
Tack and Equipment: As mentioned in our leather care section, make sure to clean and condition your tack properly. Also, disinfect grooming tools, blankets, and other equipment per the manufacturer’s recommendations to keep everything sanitary.
Safety Precautions
Protective Gear: Always wear gloves and a mask when handling cleaning chemicals and disinfectants to protect yourself from potential harm.
Ventilation: Keep the area well-ventilated during and after cleaning to prevent respiratory issues from chemical fumes.
Additional Tips
Power Washing: For areas that are very dirty, consider using a pressure washer set to a low-pressure mode to avoid damaging stable surfaces.
Floor Drying: Before laying down fresh bedding, make sure floors are completely dry to prevent the growth of mold and mildew.
A thoroughly cleaned and disinfected stable is not just more visually appealing—it’s also a safer and healthier environment for everyone who uses it. This detailed spring cleaning will help ensure your stable is a true sanctuary for your equine friends.

Pest Control: Integrated Pest Management (IPM)
Managing pests in stables and pastures is crucial for the comfort and health of horses and their human handlers. Here’s how you can employ environmentally friendly and horse-safe methods to effectively manage unwanted pests through Integrated Pest Management (IPM):
IPM is a comprehensive strategy that focuses on long-term prevention of pests or their damage through a combination of techniques such as biological control, habitat manipulation, modification of cultural practices, and use of resistant varieties.
Here’s how it breaks down for stable management:
Prevention
Manure Management: Regular removal of manure from stalls and paddocks reduces fly breeding sites. Properly composting manure can also destroy fly larvae.
Eliminate Standing Water: Since mosquitoes breed in stagnant water, keep your water troughs clean and tackle any drainage issues in the pasture to prevent water accumulation.
Vegetation Management: Maintain the areas around your stable and pasture by keeping weeds and tall grass trimmed, reducing hiding spots and habitat for pests.
Control
Physical Barriers: Use fly masks, sheets, and boots to protect horses during turnout. Install screens on windows and doors to keep flying pests out of the stable.
Traps: Set up fly traps around the barn perimeter and near manure storage areas. Choose traps with attractants specific to the pests you are targeting, such as certain species of flies.
Fly Predators: Introduce beneficial insects like fly parasites (tiny wasps) that target and destroy fly larvae. These predators are safe for both horses and humans and can significantly lower fly populations.
Natural Repellents: Consider applying natural fly sprays that contain essential oils like citronella, lavender, or peppermint, which are known for their insect-repelling properties.
Additional Tips
Fans: Installing fans in the barn can help deter flying insects by disrupting their flying patterns.
Regular Cleaning: Keep feed tubs and water buckets clean and disinfected to avoid attracting pests with food residues or scents.
Chemical Control: If necessary, use horse-safe insecticides. Ensure that you follow the label instructions carefully, apply them judiciously, and choose products that minimize harm to the environment.
By adopting these IPM strategies, you not only reduce the immediate nuisance of pests but also contribute to a sustainable and healthier environment for your horses. This proactive approach helps keep both the stable and pasture areas more pleasant and less stressful for everyone involved.

Gear Up: Essential Spring Cleaning Tools
Spring cleaning is a big task, especially when it involves the upkeep of stables and pastures. Having the right tools not only makes the process more efficient but also more enjoyable. Here’s a list of essential tools that will help you tackle your cleaning tasks effectively:
Stable Cleaning Essentials
Manure Removal
Pitchfork and Shovel: Choose a sturdy pitchfork designed for efficient manure removal and a shovel with a comfortable grip that suits your height and strength.
Wheelbarrow: A two-wheeled wheelbarrow offers better stability and is easier to maneuver, especially when handling heavy loads like manure or wet bedding.
Bedding Management Cleaning Tools
Shavings Fork: This tool is perfect for sifting through bedding to remove soiled areas efficiently, helping to reduce waste and maintain a clean bed for your horses.
Broom and Dustpan: Opt for a heavy-duty broom with stiff bristles suitable for barn floors and a large dustpan to expedite cleanup.
Scrub Brush: Select a brush with durable bristles for scrubbing stable floors and walls; ergonomic handles can reduce strain during use.
Hose and Spray Nozzle: An essential tool for rinsing down surfaces and filling water buckets, make sure the hose is long enough to reach all areas of the stable and the nozzle offers various spray settings.
Buckets and Sponges: Have separate buckets for different tasks (e.g., washing and rinsing) and choose sponges that are effective for the specific surfaces you are cleaning.
Disinfection and Odor Control
Disinfectant: Use a horse-safe disinfectant, such as accelerated hydrogen peroxide or potassium peroxymonosulfate, following the manufacturer’s guidelines for dilution and application.
Stable Deodorizer: Select deodorizers that absorb rather than mask odors, ensuring they contain ingredients safe for use around horses.
Pasture Maintenance Tools
Debris Removal
Tractor or Utility Vehicle: For large areas or heavy debris, a tractor with a front-end loader or a utility vehicle can greatly increase efficiency.
Rake and Heavy-Duty Trash Bags: These are essential for collecting smaller debris such as leaves, twigs, and scattered trash.
Vegetation Management
Mower: Depending on your pasture’s size and terrain, choose a mower that best suits your needs, like a flail mower for tougher areas or a finishing mower for maintaining a neat appearance.
Weed Trimmer/Brush Cutter: Vital for maintaining the areas around fences, buildings, and other hard-to-reach places.
Mud Management
Shovel and Rake: Useful for spreading materials like gravel or sand to improve drainage and manage mud.
Geotextile Fabric: This helps stabilize areas prone to mud by keeping gravel from mixing with the soil below.
Additional Tools and Supplies
Toolbox: Keep a well-stocked toolbox with essentials like hammers, screwdrivers, pliers, and wire cutters for quick fixes and minor repairs.
Safety Gear: Protect yourself with gloves, safety glasses, a mask, and hearing protection, especially when operating machinery or handling chemicals.
Investing in quality tools and maintaining them can significantly ease the burden of spring cleaning and ensure that your stable and pasture management tasks are performed efficiently and safely. Always do your research and read product reviews to make informed purchases that meet your specific needs.

Safety First: Protecting Yourself And Your Horse
When undertaking spring cleaning tasks around the stable and pasture, it’s crucial to prioritize safety to protect both yourself and your horses. Here’s a comprehensive guide to staying safe while getting your facilities in top shape:
Personal Safety: Handling Heavy Equipment and Chemicals
Read Labels Carefully: Always adhere to the manufacturer’s instructions when using cleaning chemicals and disinfectants. Pay close attention to the required dilution ratios, contact times, and necessary personal protective equipment (PPE).
Wear Appropriate PPE: To prevent skin, eye, and respiratory irritation, wear gloves, safety glasses, and a mask. For added protection, consider long sleeves and pants.
Use Proper Lifting Techniques: When moving heavy objects such as feed bags or equipment, bend your knees and lift with your legs, not your back, to avoid injury.
Take Breaks: Regular breaks help prevent fatigue and overexertion. Stay hydrated and listen to your body to avoid straining yourself.
Know Your Limits: If a task requires heavy lifting or specialized skills, don’t hesitate to ask for assistance.
Fire Safety
Remove Cobwebs Regularly: Cobwebs can be a fire hazard, especially near electrical outlets or light fixtures. Clean them up frequently.
Check Smoke Detectors and Fire Extinguishers: Ensure that smoke detectors are operational and that batteries are fresh. Familiarize yourself with the location and operation of fire extinguishers.
Store Flammable Materials Safely: Keep fuels and solvents in approved containers and store them in a well-ventilated area, away from any heat sources.
Practice Fire Drills: Regularly practice a fire evacuation plan that includes safe exits for both humans and horses, ensuring everyone knows what to do in an emergency.
Horse Safety
Minimize Dust and Fumes
Turn Horses Out: Before starting any significant cleaning activities, move horses to pasture or another well-ventilated area to reduce their exposure to dust and fumes.
Use Low-Dust Bedding: Opt for dust-free bedding options to support horses with respiratory issues.
Ventilate the Barn: Improve air circulation by opening doors and windows or using fans during and after cleaning.
Clean and Disinfect Thoroughly
Rinse All Surfaces: After cleaning, rinse buckets, feeders, and water troughs thoroughly to eliminate any chemical residues.
Allow Proper Drying Time: Ensure that disinfected areas are completely dry before reintroducing horses to prevent them from coming into contact with harmful chemicals.
Be Aware of Your Surroundings
Work With a Buddy: Having someone nearby is beneficial for safely handling horses and providing assistance in case of accidents.
Keep Horses Secured: When working close to horses, use cross-ties or have another person hold them to prevent injuries from kicks or bites.
Watch for Tripping Hazards: Maintain clear walkways and aisles, and keep tools and equipment stored safely to avoid trips and falls.
Minimize Stress
Maintain Routines: As much as possible, stick to your horse’s regular daily routine during cleaning to reduce their stress.
Work Calmly and Quietly: Avoid sudden movements and loud noises that could startle horses.
By adhering to these safety guidelines, you can ensure a thorough and safe spring cleaning experience, keeping both you and your horses safe and stress-free.
Bonus tip: Use old towels or rags for cleaning instead of paper towels to reduce waste and save money.
DIY Solutions: Cleaning Hacks From The Barn
When it comes to keeping your barn clean, sometimes the simplest ingredients—many of which you may already have on hand—can be the most effective. Here’s a guide to some DIY cleaning hacks using natural ingredients, their effectiveness, and important safety considerations:
Homemade Cleaning Solutions
Vinegar and Water
Recipe: Mix equal parts white vinegar and water in a spray bottle.
Effectiveness: Vinegar is a mild acid that excels at cutting through grime, removing hard water stains, and deodorizing surfaces. It’s versatile and can be used on a variety of surfaces including floors, walls, and equipment.
Safety: While vinegar is generally safe, it can corrode certain materials like marble or natural stone. Always perform a spot test in an inconspicuous area first.
Baking Soda
Recipe: Create a paste by mixing baking soda with a little water, or sprinkle it directly on surfaces needing a scrub.
Effectiveness: Baking soda acts as a natural deodorizer and gentle abrasive, making it great for scrubbing stains, removing odors, and brightening surfaces.
Safety: Baking soda is non-toxic and safe around horses, but because it’s abrasive, use it cautiously on delicate surfaces to avoid scratching.
Lemon Juice
Recipe: Mix lemon juice with water for general cleaning, or use it undiluted for tougher stains.
Effectiveness: Lemon juice offers natural antibacterial and bleaching properties, useful for disinfecting and stain removal. Its fresh scent also provides a natural deodorizing effect.
Safety: Due to its acidic nature, lemon juice can etch some surfaces. It’s important to test it on a small, hidden area before widespread application.
Additional DIY Cleaning Options
Essential Oils
Uses: Add oils like tea tree or lavender to cleaning mixtures for their antibacterial and antifungal properties, plus they leave behind a pleasant scent.
Safety: Ensure you research safe dilution ratios for essential oils. Some oils can be toxic to horses if not used correctly.
Castile Soap
Uses: This mild, vegetable-based soap is gentle yet effective and biodegradable, ideal for cleaning various surfaces without harsh chemicals.
Safety: Castile soap is generally safe and non-irritating for most uses around the barn.
Cost-Saving Tips
Buy in Bulk: Purchasing ingredients like vinegar and baking soda in large quantities can lead to significant savings.
Repurpose Containers: Reuse old spray bottles and other containers to store your homemade cleaning solutions.
Microfiber Cloths: Use microfiber cloths for cleaning; they are more effective than traditional rags at picking up dirt and dust and can be washed and reused.
Safe Storage and Usage
Labeling: Clearly label all DIY cleaning solutions and include the date they were made.
Storage: Keep all cleaning products, homemade or commercial, out of reach of horses and children to prevent accidental ingestion.
These natural cleaning hacks can be a safer and often more economical choice for maintaining a clean and fresh barn environment. Always test new cleaning solutions in small areas first to ensure they do not damage surfaces or pose risks to your horses.

Spring Cleaning Checklist: Stay On Track
Spring is a great time to freshen up your horse property and ensure everything is in top condition for the coming year. Use this detailed checklist to help you stay organized and tackle each task efficiently:
Pastures:
- Inspect and Repair Fences: Check for broken boards, loose wires, and ensure electric fences have proper tension. Repair damages promptly.
- Remove Debris and Hazards: Clear out fallen branches, rocks, and other potential hazards, especially around gates, feeders, and shelters.
- Address Muddy Areas: Enhance drainage with swales or ditches and stabilize footing with materials like geotextile fabric, gravel, or sand. Limit turnout during wet periods.
- Check Water Sources: Regularly clean and disinfect water troughs, ensuring they are free of algae and debris.
Stables and Stalls:
- Deep Clean Stalls and Aisles: Strip stalls completely, scrub floors and walls, and disinfect with a horse-safe product. Allow surfaces to dry thoroughly.
- Remove Cobwebs: Regularly clean cobwebs from all areas, including ceilings and light fixtures, to reduce fire hazards.
- Clean and Disinfect Water Buckets and Feed Tubs: Wash daily and disinfect regularly to prevent bacterial growth.
- Organize Tack and Equipment: Declutter, clean, and condition leather tack. Store blankets and other gear properly.
Tack and Equipment:
- Clean and Condition Leather Tack: Use gentle saddle soap and a quality leather conditioner, focusing on high-wear areas.
- Clean and Store Blankets and Equipment: Wash according to manufacturer’s instructions and ensure all items are dry before storage.
- Declutter and Organize the Tack Room: Use efficient storage solutions like saddle racks and bridle hooks to keep the space orderly.
Horse Care:
- Groom and Shed Out Winter Coat: Regularly use grooming tools like curry combs and shedding blades. Consider a shedding shampoo for easier hair removal.
- Schedule a Spring Health Check: Arrange for vaccinations, a dental exam, and discuss any health concerns with your veterinarian.
- Adjust Diet as Needed: Transition the diet based on pasture availability and adjust grain rations based on activity level and body condition.
Additional Considerations:
- Manure Management: Implement regular removal routines from stalls and paddocks to minimize flies and odor.
- Pest Control: Use an integrated approach with fly predators, traps, and natural repellents.
- Barn and Property Maintenance: Inspect and clean gutters, downspouts, barn fans, and ventilation systems to ensure they are functioning properly.
This comprehensive checklist is designed to help you cover all essential aspects of spring cleaning on your horse property, promoting a safe and healthy environment for both you and your horses. Adjust the tasks as necessary to fit your specific situation and property needs.
And to make it easier to stay organized and ensure you don’t miss any crucial steps, I have created a handy printable of this checklist that you can download and use as you work through your spring cleaning routine.
Download your FREE Spring Cleaning Checklist for Horse Owners! Simply enter your email below, and we’ll send the checklist straight to your inbox.
Wrapping Up
Spring cleaning is indeed a crucial part of maintaining a healthy, safe, and enjoyable environment for both horses and their caretakers. While the tasks might seem daunting at first, having a structured plan like the checklist provided helps streamline the process and ensures that no important areas are overlooked.
As you move forward with your spring cleaning, remember to adapt the checklist to suit your specific needs and the unique circumstances of your property. Every stable and pasture is different, and what works for one might not be ideal for another.

Here are a few final thoughts to keep in mind:
- Prioritize Safety: Always keep safety at the forefront, both for you and your horses. This means wearing appropriate gear, handling equipment properly, and being cautious with cleaning products.
- Keep a Schedule: Try to maintain a regular cleaning schedule throughout the year to prevent tasks from becoming overwhelming. Regular upkeep can make the spring cleaning blitz a lot more manageable.
- Involve Others: Don’t hesitate to involve other barn members, family, or friends. Not only can this make the work lighter, but it also fosters a community spirit.
- Take Time to Enjoy: While the focus is often on cleaning and maintenance, don’t forget to enjoy the time with your horse. Spring is a wonderful season to start new training programs, enjoy leisurely rides, or simply spend time grooming and bonding.
And don’t forget to download our handy spring cleaning checklist to stay on track! Simply sign up through the form that says “the horse owner’s spring cleaning checklist”, you will join our email list if you aren’t already on it and we’ll send the checklist straight to your inbox.
By staying organized and proactive, you can ensure that your barn and pastures remain in top condition, allowing you and your horse to enjoy the beautiful spring season to its fullest. Happy cleaning, and here’s to a wonderful season ahead with your equine friend!