Let’s talk reins.
I know—of all the things you’re learning as a rider, how to hold the reins might seem small. But I promise you, it’s one of the most important skills you’ll ever develop in the saddle. Your reins are part of your communication with your horse. And like any good conversation, how you say something matters just as much as what you say.
Today, we’re going to walk through exactly how to hold the reins in English riding, step-by-step, with all the little details I used to explain to my students during lessons. Imagine we’re standing in the arena together. You’re on your horse. I’m by your stirrup, reins in hand, ready to show you what soft, clear contact really feels like.
First Things First: What Are the Reins For?
Your reins aren’t just there to stop your horse.
They help with direction, connection, rhythm, and most importantly—communication. You’ll use them to ask for turns, transitions, a half-halt, flexion, or softness. But your hands should never pull your horse around. Instead, you’re aiming for a feel that is light, steady, and alive in both directions—from you to your horse, and your horse back to you.
So to do that, we need to start with how you hold the reins.
Let’s Break It Down: How to Hold the Reins Step-by-Step
1. Pick Up Your Reins Evenly
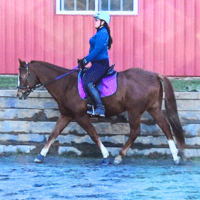
Start by gathering your reins so they’re even in length. One rein in each hand. The reins should come from the bit, up the neck, and into the bottom of your closed fists.
If one rein is shorter than the other, your contact will feel uneven to the horse. So before we go further, line them up.
Quick tip I use with students: If your reins have a center marker or stitching, check that it’s sitting evenly with each other—that’s your visual cue that your reins are even.
2. Your Thumbs Go on Top
This is where most riders go wrong at first, and I always take a moment to adjust their hands.
Your fingers should wrap around the reins with your thumb resting on top—think of gently pressing your thumb down like you’re putting a lid on a jar.
Your thumbs don’t grip, but they do secure the reins in place. This also helps prevent the reins from slipping through your fingers without you noticing.
3. Hands Upright – Like Holding a Coffee Mug
Picture yourself holding two coffee mugs. Your knuckles should face mostly forward, not flat with palms down. If I’m standing in front of you, I should see your thumbs on top, not the backs of your hands.
I used to often say: “No piano hands.” Flat hands tend to turn stiff and disconnected. Upright hands are soft and mobile, which is what we want.
4. Soft Fist – Not Clenched Ones
You don’t need to crush the reins. Wrap your fingers around them with gentle firmness—just enough to hold them steady, but not tight enough to block feel.
The goal is to stay elastic, so your hands can follow your horse’s motion without bouncing or yanking.
Try this on the ground: hold the reins like you’re holding a baby bird. You want to keep it from flying away, but not hurt it. That’s the feeling you’re after.
5. Keep Your Elbows Bent and Close
Your elbows should rest naturally at your sides with a soft bend. You’re aiming for a straight line that runs from your elbow, through your forearm, down the rein, and into the bit.
If your hands are too high, too low, or your elbows are floating away, that line breaks—and your signals become unclear to your horse.
Instructor tip: I used to walk alongside students and gently turn their elbows in. Just that small adjustment often improved the feel instantly.
6. Hands Slightly Apart, Just Above the Withers
Don’t glue your hands together. They should sit about 4 to 6 inches apart, hovering just above and in front of the saddle’s pommel. That allows for straight, independent contact on each side of the bit.
Too close, and you lose flexibility. Too wide, and you’re pulling the bit sideways in your horse’s mouth.
Think of softly holding a beach ball between your hands—not squeezing it, just holding it in space.
Common Mistakes I See (and How to Fix Them)
❌ Reins too long:
If your reins loop like jump ropes, you have no contact. Shorten them until you can feel a soft, steady connection.
❌ Gripping with fingers or holding too loose:
Try riding transitions and asking for halts using only your seat. Can your hands stay soft and still, or do they overreact?
❌ Wrist flipping or curling fingers:
Your wrist should stay aligned, not collapsed. If your hands are flopping, think about growing taller through your forearms.
❌ Pulling instead of asking:
Your reins should invite your horse, not yank. Pair each rein cue with a supporting aid—like a half-halt from your seat or leg—to make your meaning clear.
Practicing at the Walk: Feel Before You “Fix”
If you’re new to riding, here’s one of my favorite simple exercises to help you feel the reins instead of just “holding them right.”
- Start at the walk on a loose rein.
- Gradually shorten until you feel a light, steady connection. Your horse should still move freely forward.
- Then ask for a gentle halt—without pulling. Just close your fingers, exhale, and engage your seat. Feel how your rein helps suggest the halt, not force it.
- Walk on and try again, noticing how much or little pressure you need.
Repeat this exercise until you can hold the reins with a soft hand and feel a consistent, elastic line between you and your horse.
Final Thoughts
Learning how to hold the reins might seem like a small technical detail—but it’s not.
It’s the beginning of a conversation. It’s how you show your horse you’re listening. It’s how you keep them confident in your hands.
And like any skill, it takes time and repetition. So don’t rush it. Each ride is a chance to improve your feel and become a little quieter, a little more in sync, a little more balanced.
Before long, your hands will become second nature—and your horse will thank you with soft ears, a swinging back, and a trust you can feel through the reins.
Have a question about rein handling, contact, or common riding challenges? Leave a comment below or send me a message—I’m always happy to help.
Ride joyfully,
Kacey