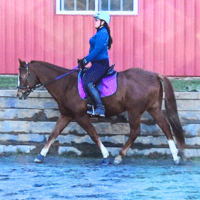
If you’ve ever felt like adjusting your reins mid-ride throws everything off—your rhythm, your hands, your focus—you’re not alone.
Shortening and lengthening the reins seems like such a basic task. But it’s one of those little riding skills that separates a rider who’s surviving the ride… from a rider who’s shaping it.
Today, I want to teach you how to adjust your reins the right way—quietly, confidently, and in rhythm with your horse. The kind of rein handling that doesn’t make your horse hollow out, throw their head, or lose contact. And don’t worry—we’re not going to fumble around or drop a rein trying to figure it out.
Come stand next to me in the arena, reins in hand…well in your mind, and I’ll walk you through it just like I would in a lesson.
Why Adjusting Your Reins Matters
Think of your reins like a phone line between you and your horse.
When the reins are too loose, the connection is fuzzy—you can’t really hear each other. When they’re too tight, the line is overloaded—and your horse starts to feel trapped. So what do you do when things change?
- Your horse stretches down.
- You ask for a transition.
- You prepare for a canter depart or need more bend on a circle.
- You walk on a loose rein and then need to pick up contact again.
All of those moments require a change in rein length—without fuss, without resistance, and without disrupting the balance you’ve worked so hard to create.
But here’s the catch: you need to be able to adjust your reins without moving your elbows, pulling on your horse’s mouth, or losing your position.
Let’s go step by step.
How to Shorten the Reins While Riding
This is the more common adjustment—and the one most riders struggle with early on.
Let’s say you’re riding at the walk and your reins have become a bit long. Here’s what to do:
1. Keep Contact With One Hand
Let’s say you’re starting with your left rein.
- Hold both reins as usual, with even contact in both hands.
- Slide your left hand forward slightly, letting a little rein slip through.
- Your right hand will now have a little extra rein between it and the bit.
This is important: the left hand keeps the connection for your horse while the right hand adjusts.
2. Creep the Right Hand Forward to Shorten
- Open the fingers of your right hand slightly.
- Slide the hand forward along the rein toward the bit, just an inch or two.
- Close your fingers again to take up the new, shorter length.
You’ve now shortened your right rein without pulling or lifting.
3. Repeat on the Left Side
Now do the same on the other side:
- Right hand holds contact.
- Left hand slides forward to shorten.
- Close your fingers and reset.
The goal is small, rhythmic movements, almost like a hand-over-hand action, done quietly and without disrupting your seat or rhythm.
Instructor tip: I used to tell students, “Keep your elbows at your sides like you’re pinning them with a magazine. If they flap, you’re pulling instead of sliding.”
How to Lengthen the Reins While Riding
Sometimes, you’ll want to give your horse more freedom—maybe on a long rein walk, stretchy trot, or cool down.
The process is similar, just reversed.
1. Let the Rein Slide Through Your Fingers
Start by softening your grip just slightly and allowing the rein to slip through your fingers, one hand at a time.
- Let’s say you’re beginning with your right hand.
- Loosen your right-hand fingers just a touch and let the rein slide a small amount.
- Then do the same with the left.
You still want control—don’t drop the reins or throw your hands forward. It’s more like letting a little ribbon unspool gently between your fingers.
2. Keep a Following Hand
As you lengthen, allow your hand to follow your horse’s neck slightly forward—but keep your elbows soft and your body upright. You’re still in balance, even though you’re giving more rein.
Common mistake to avoid: Throwing the whole rein away in one quick motion. That makes the horse lose the connection abruptly, and many horses will lift or hollow their back in response.
Practicing at the Walk (Before You Need It at the Trot)
If you’re new to adjusting your reins—or just never felt confident doing it mid-ride—start here.
Exercise: The Walk and Adjust Drill
- Walk on a loose rein.
- Practice shortening one inch at a time, right then left.
- Then reverse—lengthen them again, inch by inch.
- Do it without changing your pace, tipping your shoulders, or moving your elbows away from your sides.
Once you feel smooth at the walk, try it in a posting trot. Eventually, you’ll be able to adjust your reins in any gait, even in transitions or over poles.
Quiet Hands, Clear Communication
The more subtle your rein adjustments are, the better your horse will respond. It’s not about getting it perfect on the first try—it’s about creating feel and fluidity over time.
And here’s something I tell every student: Your horse will trust you more when you handle the reins with care. If every rein change feels like a tug-of-war, the horse braces. But if your hands are soft and confident, they stay relaxed—and so do you.
What’s the “Right” Rein Length?
That’s a great question. And it’s one I’ll be answering in next week’s post.
Because here’s the thing: the correct rein length is different depending on your horse’s frame, your discipline, your level of training, and your goals for the ride. But there are signs you can look for—and a few alignment tricks that will help you find that sweet spot between too loose and too tight.
So if you’ve ever wondered how short is too short, or how long is too long, stay tuned. We’re going to demystify it together.
Until then, I challenge you to practice shortening and lengthening your reins with as little movement as possible. Do it at the walk, during transitions, or on a quiet hack. Feel what your horse tells you in response. That’s where the magic starts.
Got questions about rein handling, contact, or feel? Leave a comment below or message me—I love helping riders learn the little things that make a big difference.
Ride joyfully,
Kacey