Do you want to be able to practice horse riding at home? Maybe you want to ride more but you aren’t able to for one reason or another? Maybe you want to practice riding off the horse to develop more confidence in the saddle? Are you frustrated that you aren’t improving in your riding as fast as you would like?
Well I have learned ways you can improve your riding at home without having to buy one of those fancy horse riding simulators. As great as it would be to have one.
One of the best things you can do to improve your horse riding skills from home is by doing certain helpful exercises with a cheap exercise ball.
Using an exercise ball can help improve your:
- riding posture & alignment
- balance
- flexibility
- mobility in your hips & seat
- stability in the saddle
It’s so cool to know there is a way to practice riding right from the comfort of your home.
In this post I am going to share some
- more information on exercise balls
- which size you should get for your height
- more info on the benefits of using exercise balls for horse riders
- some helpful exercises you can do with your exercise ball at home to improve in your riding
- some exercise ball videos for equestrians
I will explain step by step how to do these exercises here on this post.
What Are Other Names For Exercise Balls?
- Swiss Ball
- Medicine Ball
- Yoga Ball
- Stability Ball
- Physio Ball
- Balance Ball
What Size Ball Should You Get?
This size chart is meant to help you find a comfortable ball size that is tall enough to be able to simulate riding position, but short enough to get your feet flat on the ground.
However it is only a guideline because some people have longer legs, short torso and some have shorter legs and longer torso. Then there are also some people who are equal-ish in their legs and torso.
| Your Height | Ball Size |
| 5’5 and under | 65 cm-75cm |
| 5’5- 5’10ft | 75 cm-85cm |
| 5’10 ft and over | 85cm-95cm |
If your knees are below your hips when your feet are out in front of you flat on the ground, then the ball is either too small or needs to be inflated more.
I am 5’8 and I have been using a 55 cm ball and it is way too small. My hips are a good bit below my knees even with inflating the ball more.
I am still using it for now but I just ordered a 75 cm ball online, because I want to simulate a horse as much as possible. I have a shorter torso and longer legs.
I am fine with my hips being higher than my knees but I need to make sure my feet will be able to be flat on the ground.
You can use any brand exercise ball, such as ProBody Pilates Ball (You can look at it on Amazon) which comes in sizes from 45cm-85cm.
What Are The Benefits Of Using An Exercise Ball For Horse Riders?
- Great for simulating movements of the horses back.
- Helps lower back and pelvic area to become more flexible.
- Helps lower back and pelvic area to become stronger.
- Helps to increase range of motion in the lower back and pelvic area.
- Helps to prepare your body to receive the motion on the horse freely and without restriction.
- Helps to stretch and open the hip joints.
- Helps to strengthen your core muscles.
- Helps to strengthen your back muscles.
- The ball is unstable so your body constantly has to adjust to keep centered and balanced over the ball, similar to what you would have to do with a horse moving under you.
- Improves balance.
- Improves riding position.
- Improves stability.
- Able to work on correcting unevenness in the body and work on symmetry.
- Able to work on correct body alignment.
- Able to do different stretching exercises to help develop more suppleness.
8 Swiss Ball Exercises For Equestrians
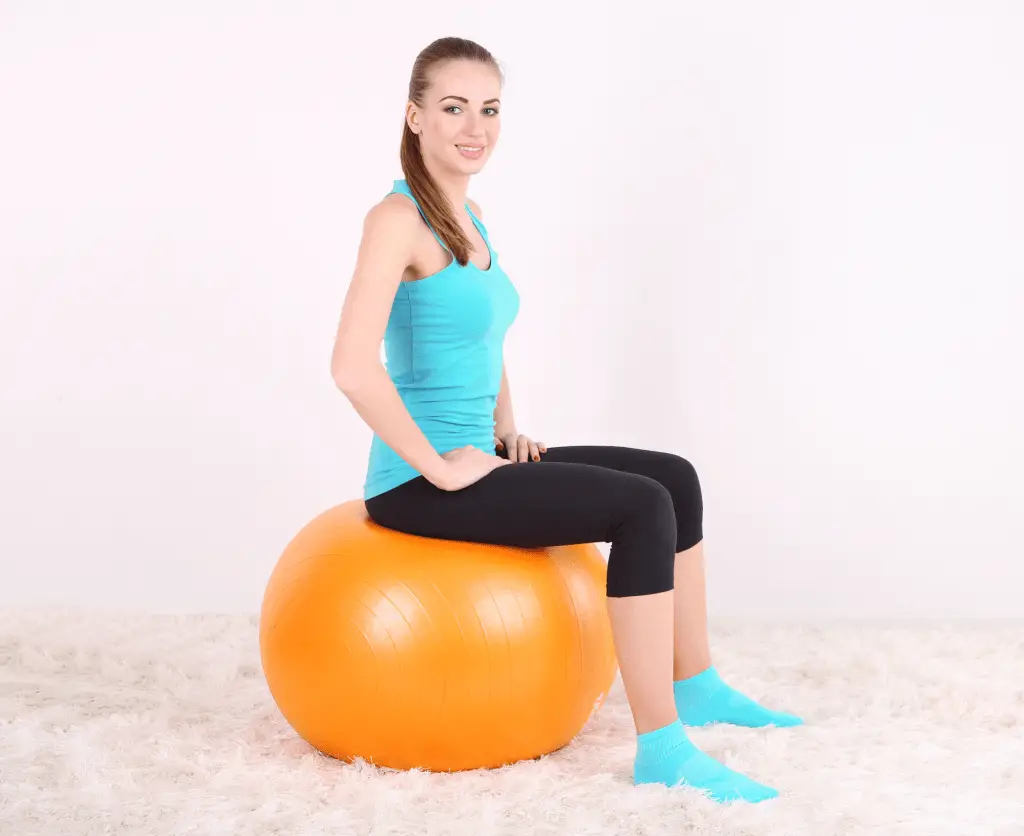
1. Find Your Neutral Spine
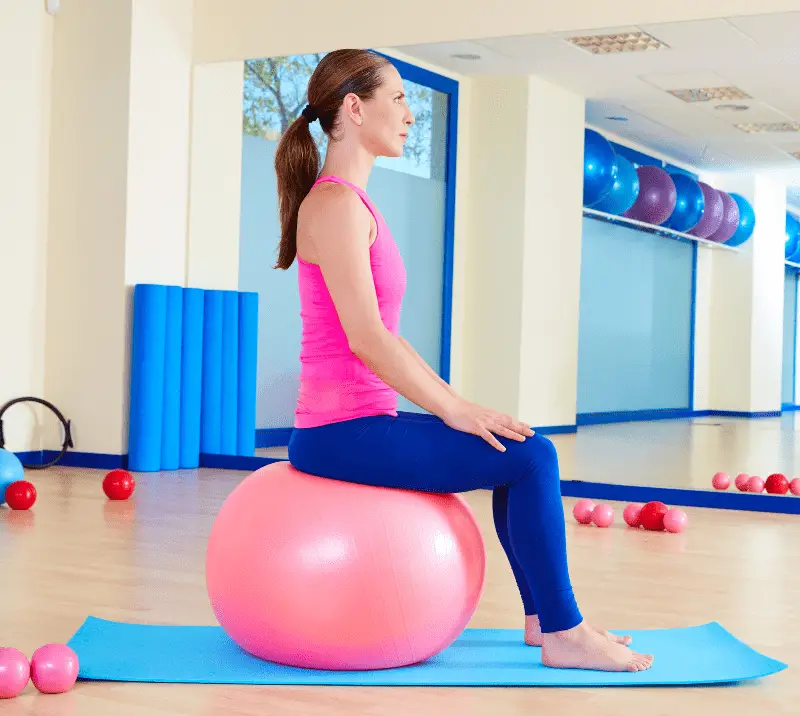
This is about finding the right alignment for your body, like building blocks stacked on top of each other. Proper body alignment protects the spine and helps to prevent injuries and soreness. When your spine is not in the correct alignment it puts undue stress on certain areas of your body and makes it harder for you to absorb the movement of the horse and well as blocks and hinders the horse from freely moving forward. The neutral spine with activated core will help to stabilize the pelvis and hips.
Steps to find neutral spine:
- Sit on your exercise ball in front of a mirror showing your side view.
- Create a 90 degree bend in your knee with your toes pointed forward.
- Activate your core by pulling your belly button in toward your spine and lifting your chest and then think of your shoulders opening and smiling.
- Make sure you are not hunching or arching your back.
- You should feel equal use of muscle in your abs and back. If you don’t feel your back muscles activated your body is not in neutral spine position.
This is a good exercise to start with, but you should be practicing this regularly throughout your day. Whether driving in the car, sitting at work, watching tv, exercising, going for a walk.
2. Bouncing Warm-Up
This is a good exercise to help loosen and warm up your body.
How to:
- Sitting with a neutral spine, let your arms relax by your side.
- Keeping your upper body stable and equal weight on both seat bones.
- Start bouncing.
- Work on keeping a steady rhythm, and equal bounce each time.
- Do this for 1 minute.
3. Pelvic Tilt
By tilting your pelvis forward and back you will get better mobility through the pelvis. As riders we want the pelvis to move completely independently from our torso, also known as an independent seat so that we can accommodate the movement of the horse under us.
Steps to do pelvic tilt:
- Sit in more of a riding position and put your hands on your hips.
- Tilt your pelvis up to the front of the ball so your belly button closes.
- Then tilt your pelvis the opposite way so that your back arches.
- Make sure your torso is staying still. The pelvis should move completely independently.
- Go back and forth with this pelvic tilts 20 times, keeping it as smooth as possible.
As you go back and forth you may notice your hips stutter and are not creating a smooth movement. If so this just means that your pelvic mobility needs work and is not as smooth as it should be.
4. Pelvic Circles
This exercise is also for pelvic mobility. Make sure your legs and upper body stay still.
How to do pelvic circles:
- Sit on the ball in neutral position and then put your hands on your hips.
- Rotate your hips in a counter clockwise direction, creating 10 small circles with the ball as if you were using a hula hoop.
- Then do 10 larger circles.
- Repeat this several times.
- Now change direction to clockwise and do the same thing.
It may help to have some hold your knees down if you are having trouble keeping your legs still. Try to keep your circles as smooth as possible.
5. Pelvic Side To Side Rocking
This helps with alignment if you tend to sit heavier on one seat bone than the other. This also helps with aids that need one seat bone weighted.
Pay attention and notice any unevenness as you do this exercise.
How to do pelvic side to side rocking:
- Sit in a neutral position with your hands on your hips.
- As you take a breath out lift the right side of your pelvis up to your right armpit.
- Bring it back to center as you breathe in.
- Then bring your left hip up toward your left armpit breathing out.
- Bring your hip back to center breathing in.
As you lift up each side. It should feel like the side being lifted is shortening and the other side is lengthening. You should be able to feel when you lift one side up the other side sinks down into the ball.
When you figure out which side you side you sit heavier on. Use this exercise to lift the heavy side up a bit to even the pressure on both seat bones.
6. One Leg Lift Exercise
This exercise works on your balance and stability. When you ask for a shoulder in or canter you need to move your change positions of your legs and seat bones but you don’t want to lean to one side or the other you want to stay upright. This exercise helps develop that stability.
How to do the One Leg Lift:
- Start off in neutral position.
- Lift one leg at a time. Lift foot only a couple inches from the floor.
- Make sure you don’t drop to one side by activating your core and back muscles.
- After 5-10 seconds slowly lower your foot to the ground and switch legs.
- Then you can change up the pace of switching your feet.
7. Balancing On Ball
This is a good exercise for developing the independent seat and working on your balance. Your torso stays still as your core is engaged and your pelvis moves around trying to find balance as it moves with the ball under your torso.
How to do the balancing on a ball exercise:
- Sit on the ball and put your hands on the sides of the ball.
- Push your seat back a little bit.
- Lift your feet off the ground and put the backs of your heels against the ball.
- Try to balance yourself.
- You might look rough at first but you will get the hang of it very quickly.
- As you get the hang of it try to sit up taller.
8. Hip Opener
This is a great very simple stretch for loosening your hips.
How to do the hip opener stretch:
- Start off in a neutral spine position.
- Slowly spread your legs out to the side of the ball so your legs are on either side.
- Let your thigh become perpendicular to the ground. So your knees are pointing down.
- Work on relaxing your hips as much as possible. Stay in this position for 30 seconds and move your legs back to the front for a break.
- Repeat and try the pelvic tilt, pelvic rotation and moving your pelvis side to side.
If you are really tight in your hips you may possibly cramp up. If you do bring your legs in front of you and lift your cramping leg knee up toward your chest or stand up, wiggle your leg and walk it off.
Moving Your Pelvis With The Horse’s Different Gaits
You can practice moving your hips like you would in the saddle at the different gaits. I will try my best to help you find the correct motion to practice for each gait.
The more you know about the motion your pelvis makes at each gait and the more you can practice the feeling of it off the horse, the easier it will be when you are riding.
For each of these exercises you will start in a riding position with a neutral spine. But you can also start out practicing these with your feet out front at 90 degree angle if that is easier.
When getting into your riding position think of your ear shoulder hip and ankles as building blocks. Keep those building blocks stable and stacked one over the other.
I will also list the horses footfalls that are taking place for each of these gaits to help you get a sense of the movement.
Walking Motion
The walk has no moment of suspension. Suspension is when the horse has all 4 feet off the ground in a gait.
Four beats in this order:
- right hind
- right front
- left hind
- left front
Keep in mind when your horse starts to walk they may follow a sequence starting with the left hind. So it is good to learn to recognize which of your horse’s feet are moving when.
We will practice moving to the walk with the footfall sequence above.
How to move your hips on the ball like you are riding the walk:
- Sit in your riding position with a neutral spine.
- Slide your right hip forward, slightly sideways toward the right and sink down into your right knee.
- Come back to the starting position.
- Slide your left hip forward, slightly sideways toward the left and sink down into your left knee.
- Come back to the starting position.
- Continue this sequence, it should all be a fluid non-stop motion. You want the movement to be smooth. Your upper body and lower legs should stay still.
- Try changing the speed of “Your walk”. Slower walk and more forward walk.
Posting Trot Motion
The trot has a moment of suspension between the two beats. Which is why you feel a bounce in the trot. The horse is lifting up on the ground and coming back down. Based on the horses conformation and spring in the suspension, some will feel bouncier than others.
Two beats in this order:
- right hind/ left front
- left hind/ right front
During the trot the horse’s head is pretty stable. So while you are posting you need to keep your hands pretty steady. You don’t want to make the mistake of moving your hands with your body as you post.
To work on steady hands at the posting trot you can tie 2 ropes to a door knob and hold them like reins.
How to move your hips on the ball like you are riding the posting trot:
- Sit in your riding position with a neutral spine.
- Swing your hips up and forward letting your weight drop down into your knees and into your heels. Imagine your belly button being pulled by string diagonally up and forward. Keep your ribs directly over your pelvis.
- Come back down onto the ball and let the bounce of the ball help you swing your hips right back up.
- Continue this motion as smooth and consistent as you can. Keeping your upper body and lower legs still. Work on developing a steady rhythm.
- Practice posting slower and then practice a more “forward trot”.
- Try not to let your back arch and keep the core engaged for the neutral spine.
Your legs will start to get sore after a while. If you feel pain at all in your knees stop the exercise If your ball is too short for you, that will cause your legs to get tired more quickly and also strain your knees more
Sitting Trot Motion
The suspension and footfalls in the sitting trot are the same as for the posting trot. However you may start learning the sitting trot at a slower pace which will have less suspension or bounce in the trot.
The faster the horse goes in the trot usually the more bounce there is and the more collected the horse goes the more suspension even though the trot may seem slower for the collected trot.
Make sure your lower back and core are stable. You don’t want to let your lower back move all over the place to absorb the motion of the sitting trot. This puts your back at risk for injury.
Having a stable lower back and strong helps to protect your spine from wear and tear.
Instead you want to absorb the motion in your hips and pelvis.
How to move your hips on the ball like you are riding the sitting trot:
- In riding position start by bouncing on the ball for a little while keeping your building blocks stacked and core engaged.
- Now every time you come up from the bounce, close your hips, with slight pressure on the exercise ball with your thighs.
- As you come down from each bounce, think of relaxing your thighs a little, allowing the hips to open.
- Then add in every time the bounce lifts you and you close your hips, bring your hips diagonally forward toward the leading leg.
The right hind/ left front you would diagonally come to the left.
The left hind/ right front you would diagonally come to the right.
Canter Motion
The canter has a moment of suspension after the 3 beat then the footfalls repeat again.
Canter, right lead – three beats in this order:
- left hind
- right hind/ left front
- right front
Canter, left lead – three beats in this order:
- right hind
- left hind/right front
- left front
How to move your hips on the ball like you are riding the canter:
- In riding position or neutral position.
- Roll the ball down and forward a little bit.
- Then bring your hips up and back, down, forward, up back.
- Repeat. Imagine you are creating a backwards circle, when you do this motion.
- Try to make it as fluid as possible and get some momentum like a real working canter would be.
- Don’t rock your upper body with the motion. Your upper body should remain still.
- Now adding one more thing. Whichever canter lead you are practicing for example right lead canter. Let the right hip lead and go diagonally forward to the right only slightly.
- Then opposite for the left lead canter.
There are also other helpful exercises for horse riding you can do with an exercise ball that doesn’t include sitting on the ball. If this post ends up being helpful for people, I will create another post with these other helpful exercises.
Exercise Ball Videos For Equestrians
Better Use of Your Back Riding (with the exercise ball) -By HorseClass Used to be CRK Training
Video:
Using A Balance Ball To Improve Your Seat In Dressage by Dressage Rider Training
Improve your dressage with your horse further with these simple riding exercises.
Video:
Equestrian Pilates video 3: Improving your riding seat on the gym ball by Epsom Physiotherapy and Sport Injury Clinic Ltd
Video:
Equestrian Pilates video 4: Rider exercises in walk trot and canter on the gym ball by Epsom Physiotherapy and Sport Injury Clinic Ltd
Video:
Fit to Ride Foundation Exercises with Jon Pitts
Video:
Cheers, Kacey
Did You Find This Article Helpful? Here Are More!
- 9 Powerful Ways You Can Restore Your Confidence Riding Horses
- How You Can Improve Your Riding Skills Without A Horse
- Can You Ride A Horse On Your Period?: The Low Down On Periods And Horse Riding
- How To Know You Are Ready To Buy A Horse
- Different Kinds Of Horse Leases: Choosing What Kind Is Best For You
Can you make a video of this?
Yes that’s a good idea! It will most likely look a little awkward at times, haha. But I imagine it would be helpful to people. I will add that to my list of videos I still need to create for the YouTube channel.