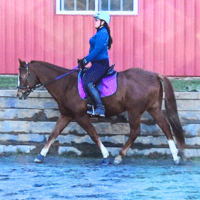
The time has finally come you are going to be going to your first horseback riding lesson. I bet you are so excited and can hardly contain your excitement. But are you prepared? Do you have the right clothes and gear? Do you have an idea of what you will be practicing and working on in your riding lesson?
I have taught many new rider’s first lessons over the years and can give you a general idea of what to expect. Keep in mind though, your lesson may not follow these guidelines exactly, every barn is a little different.
At your first horseback riding lesson you often learn:
- Basic safety around horses
- How to groom and tack up
- How to lead and ask the horse to stop
- How to do a tack safety check before mounting
- How to mount and dismount
- Proper riding position
- How to ask the horse to walk, turn and stop
- How to use your legs and hands to communicate to the horse
- How to care for horse and tack after riding
This is a basic overview of what you will be doing. Some barns also may have you trot in your first lesson, while others will not. In my lessons I would have my students stick to the walk for their very first lesson.
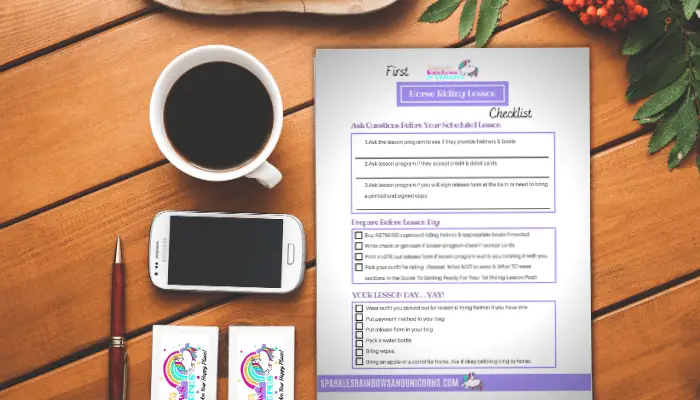
Before we move on I just want to let you know I made a printable checklist for your first horseback riding lesson so that you don’t forget a thing. You can get the free checklist at the bottom of the post.
Now let’s go into more detail about the different aspects of your upcoming lesson and answer questions you may have. This way you will have confidence going into your lesson and feel prepared as possible.
What Not To Wear In Your Riding Lesson
I thought let’s start off with what you shouldn’t wear at your first riding lesson. You don’t want to wear these clothing items I am going to list off and not just because you will look more like a newb. You want to avoid these clothes for your own comfort and safety reasons.
Clothing To Avoid While Horseback Riding
This does not encompass all the clothing you should avoid but it gives you a good idea.
| Footwear | Bottoms | Top | Other |
| *Sandals *Sneakers *Tennis Shoes *High Heels *Hiking Boots | *Shorts *Capri pants *Cropped pants *Baggy Pants *Tight Restrictive Pants | *Crop Top *Sleeveless Top *Tank Top *Baggy Tops *Very Long Tops | *No Helmet *Bicycle Helmet *Necklaces *Dangle Earrings *Scarf |
What to Wear In Your First Riding Lesson
For recommendations and tips for what to look for when buying riding clothes and gear, check out my Gear Guide page.
Now let’s go over the basics you’ll want to wear to your first riding lesson.
If you decide that riding is something you want to continue with then you should purchase actual riding clothes and gear.
Also take note there are a few other items not listed here that you may want to purchase if you made the commitment to continue riding. Such as gloves, half chaps and show clothes if you decide you want to compete at some point.
Pants
Make sure you don’t wear pants with big inseams, because this rubs your inner leg and will most likely result in sores or chafing. Shorts can also cause the same problem.
I am guessing you don’t have riding breeches yet, seeing as you are new to this and may not be sure whether you want to invest in gear yet. Jeans are okay for western riding and even english riding.
But for english riding I would suggest you wear jeggings or leggings with thicker material, because they are stretchy, flexible and overall fairly comfortable for riding.
If you decide to commit to riding, it’s time to buy breeches unless you are riding western. There are jeans specific to western riding.
Breeches and riding tights have no inseams, come with knee patches or full seat for some grip, rubbing, and protection from wear and tear.
Undergarments
Tall socks are good for extra protection from rubs on your lower legs.
Although you may or may not trot which is what would cause the majority of the rubbing on your legs. Trotting involves a lot of movement and motion, probably bouncing when you are first starting out.
Make sure you wear supportive undergarments whether you are a female or a male, so you stay comfortable. Feeling uncomfortable while riding is very distracting and can take away from the lesson.
Shirt
You don’t want to wear long baggy shirts or jackets for a couple of reasons. You may get caught on the back of the saddle or when you sit down and it’s harder for your instructor to see your riding position.
You don’t want to wear tank tops because if you fall off you are more exposed and likely to scratch up your shoulders, plus it may not be appropriate.
I suggest you wear fitted shirts and jackets, short enough you aren’t sitting on them, or if they are longer tuck your shirt in. Polo shirts usually work well for riding and look presentable but a regular fitted t-shirt works as well. In cooler weather vests with long sleeves are nice for riding.
Boots
You don’t want to wear sneakers, high heels, or sandals. Horses are heavy animals and if they step on your feet without proper protection, then you may have a very painful situation.
You should wear a hard leather toed shoe with a defined heel and a smooth toe. Your toes will be more protected and your feet will be less likely to slide through the stirrup when you are riding.
If you don’t have a heel and your foot slides through the stirrup and you happen to fall off your foot may get stuck and you can get dragged by the horse. Proper footwear is a necessary safety measure.
Helmet
Finally the helmet. I suggest you always wear one when you ride and more specifically an ASTM/SEI approved helmet, not a bike helmet. They are specifically tested with horseback riding safety standards.
I have fallen off many times and helmets have really saved my butt or should I say head. You should call and ask if the stable you are going to take lessons from provides helmets. Now this may be okay temporarily but definitely get your own helmet if you continue to ride.
Here’s why. It’s possible someone may have had lice. Other people sweat in those helmets. The helmets may be damaged if a previous rider had fallen and hit their head, which means the integrity may be compromised even if it is not totally visible.
Lastly it is hard to find a perfect fitting helmet when you borrow one. It is much safer to have a helmet that fits you properly.
What Else To Bring To Your Riding Lesson
Here are some ideas of other things you may want to bring with you for your riding lesson.
- Bring a change of shoes and a bag if you are worried about the car getting dirty. You can put your riding boots in the bag when you are done.
- Bring a water bottle. Riding is exercise and it is good to hydrate before and after your ride. Though the first few lessons are usually more easy-going.
- Bring your payment cash or check to the barn. Card if they accept them.
- Bring a signed release form if you needed to print and fill out at home before the lesson.
- Wipes. It may be beneficial to have some wipes with you. Your hands can get pretty dirty and you may sweat under the helmet.
- Layers for cold weather. You may warm-up and get too hot under a warm coat. It’s a good idea to have layers you can take off or put on.
- Phone numbers that can be called in an emergency.
When You Get To The Barn For Your First Riding Lesson

You can expect to be greeted by your riding instructor or barn help. They will have you sign a release waiver or if you are under 18 years old in the United States then a parent will sign the waiver.
Most barns will take checks and cash, but find out ahead of time if they take credit or debit cards if that is your plan. Not all barns are set up for taking cards.
You may get a quick tour of the facility so you can get familiar with the surroundings and where everything is. But don’t worry you won’t be expected to remember everything in your first lesson.
If you don’t have a riding helmet at this point you will most likely be fitted for a riding helmet and some barns even have paddock boots you can borrow. But like I said before call ahead and ask so you can be prepared with the equipment you need.
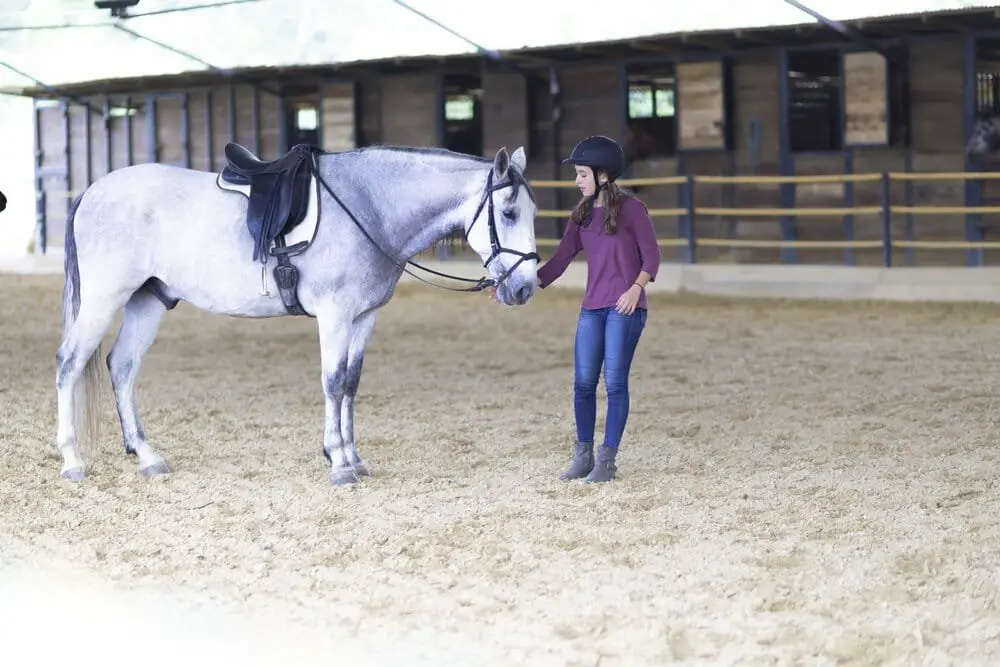
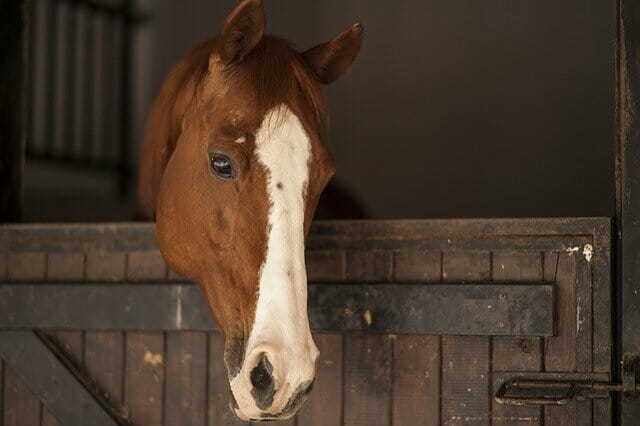
Next, you will meet the horse or pony that you are going to ride. You won’t get to choose the horse you want to ride. The instructor will choose for you based on your size and experience. The instructor may tell you a little bit about the horse like the age and breed and some interesting facts or stories about your mount.
Let the horse sniff your hand as a hello. Horses usually sniff one another’s noses as a greeting.
12 Tips For Staying Safe Around Horses
1) Wear proper footwear, because you have a big risk of getting your foot stepped on. I’ve had my foot stepped on many times and had to learn the hard way. Horses don’t always pay attention to where their hooves are and they can’t see where your feet are when you are standing right next to them.
One time I was in the stall with my horse Storm and I was wearing flip flops thinking I would be fine because it was only a minute. Well, a dog happened to run into the barn and jumped up at Storm’s stall barking. My horse spooked, jumping and landing on one of my feet. I was very lucky I just got swelling and bruising. I could have broken my foot or maybe lost a toe or two.
The best shoes are leather shoes with a hard leather toe. Sneakers are too soft and won’t help much and I have heard controversy with boots that have a steel toe. I heard the steel toes boots can crush your toes with a horse stepping on them but I also heard that the horses don’t weigh enough to crush them. Personally I just avoid them.
2) Talk to the horse softly as you approach him, because horses get startled easily and they have blind spots. They may not see you or know you are there, then when they see you they may spook, which could result in someone getting banged into, run over or possibly hurt in some way.
3) Avoid blind spots, so that the horse can see and know where you are. The horse has two main blind spots which are directly behind the horse and directly in front. Stick to the sides of the horse where they can see you. Their legs are powerful. The front legs can strike and the hind legs can kick. The safest place is near the horse’s shoulder.
4) Never wrap anything attached to the horse around your hand. For example, if you are leading the horse with the lead wrapped around your hand and the horse starts to panic and pull back, the lead line will tighten around your hand. This can injure or break your hand and if the horse starts to bolt and take off, you could be dragged and get severely injured.
It is best to fold the lead back and forth and hold it in your hand instead of wrapping it around your hand.
5) Don’t shout or yell. There are probably other people around the barn working with other horses if you shout it could startle one of the horses and end up injuring someone. Horses get startled fairly easily so keep this in mind especially with children that can be a bit rambunctious.
6) Don’t Run. This is for similar reasons as tip number 5. Horses spook easily and if you run, they may be surprised, or become frisky or fresh. Yet another way someone can get hurt.
7) When catching a horse, always try to approach a horse front walking toward his shoulder. As I said before the shoulder is the safest place around the horse. When you go to catch your horse in a paddock for example you don’t want to walk in the horse’s blind spot where you could get kicked or scare the horse.
8) Be careful about tying your horse. Make sure you tie the lead rope to a sturdy object such as a solid fence post. You don’t want to tie your horse to something he can pull back and break, he could fall over backward among other disastrous things that could happen.
Also, make sure you tie the rope high enough so that the horse doesn’t step over the lead. If the horse does this and feels the restriction, the horse may panic and try to break away. You want to tie the lead at the horse’s eye level or higher and you want the length of the lead to be about arm’s length.
9) Do not go under the horse’s belly to get to the other side. This is so dangerous, if the horse got spooked, tried to kick at a fly, walked forward, or backed up. It’s a risk you should not take. The best practice is to go around the front of the horse and not under the horse’s head either unless you want to get a good bump on the top of your head.
If you do go behind the horse, stay close with your hand on the horse’s rump as you walk past so the horse can feel where you are. The closer you are when you do this the less impact a kick can have on you.
10) Don’t pet horses like you are slapping them, horses much prefer to be rubbed or stroked softly. It can be irritating to some horses and most find it uncomfortable.
11) Feeding treats in a bucket is the best way when it comes to feeding treats. This way the horses don’t associate your hands with food and the potential for getting your fingers bitten is much lower. However, if you are going to feed with your hands keep your hand flat, fingers together and put the treat in the palm of your hand. Read my blog post How Do You Give A Horse Treats Without Losing Any Of Your Fingers?
for more on feeding horses treats safely.
12) Don’t allow horses to sniff noses with other horses when you are leading the horse. The horse may get aggressive, strikeout, squeal, or even worse spin around to kick the other horse and possibly get someone hurt in the process. It is a good practice to keep the horse away from other horses when you are handling or riding them.
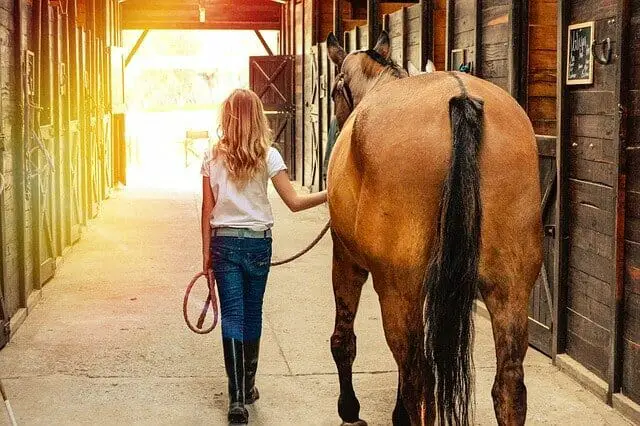
Getting The Horse Ready For The Ride

At this time your riding instructor or barn help will still be with you. They will have your horse tied up to a single tie or cross ties to keep the horse from walking away while you get the horse ready for your ride.
You will be taught how to groom your horse properly so that the horse is comfortable under the equipment. There is a lot of movement that goes on under the tack which is the horse’s riding equipment.
Dirt and buildup along with the rubbing of the tack can cause the horse to get sores and rubs. So it is important to make sure the horse is not only clean all over but especially clean underneath where the equipment will be.
You will also learn how to pick up your horse’s hooves and clean them out. This helps prevent fungus and bacteria from growing in the foot with all the gunk that gets stuck in there. It is also good for checking the horse for a loose shoe or if a stone may have gotten stuck in one of the grooves.
TIP: Some barns have the horse’s groomed, tacked, and ready for you to ride. You don’t learn how to groom, tack up, or handle the horse from the ground. I think that it is important to learn these horsemanship skills from the beginning. If this is something you want to learn make sure you find out that this is part of the lesson before signing up for your first lesson.
After grooming you will learn how to saddle and bridle your horse. Most likely you will get to saddle your horse but someone else will bridle the horse and you can watch for this time.
Bridling is more difficult than saddling because the horse’s head becomes free to move any which way and you have to know how to ask the horse to open their mouth for the bit. Then get the headstall over the horse’s ears.
After tacking up you will migrate over to the riding arena. Now you will either learn how to lead the horse or the instructor or barn help will lead the horse to the arena.
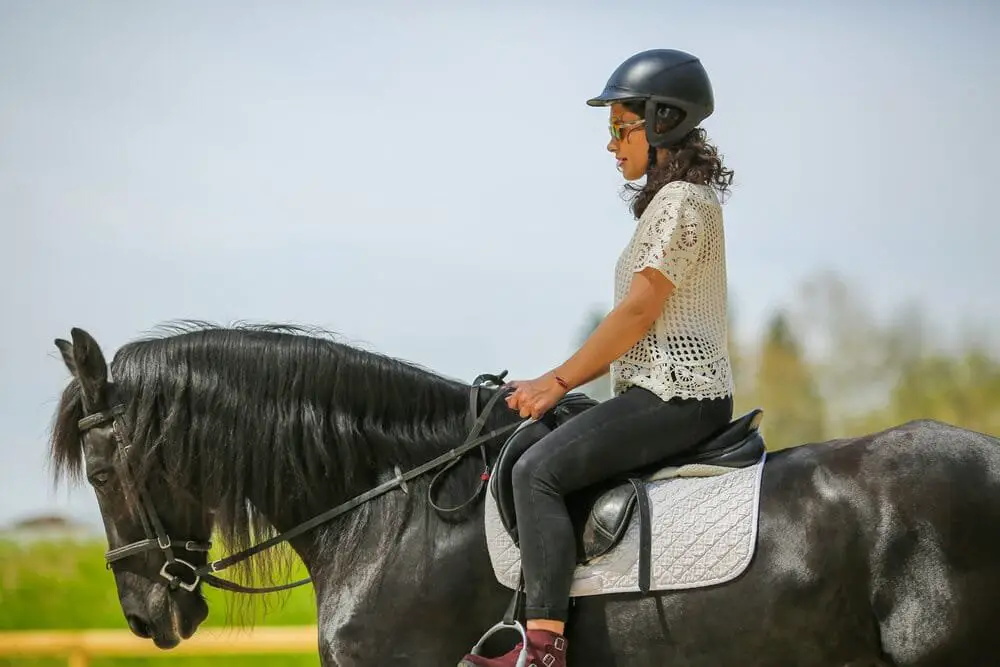
Before you get on a safety check should be done. Making sure your helmet is secure. The tack will be checked to make sure all the buckles are done up. The girth which is the belt that holds the saddle on is tight.
Then you will check the stirrup length before you get on. This will give you a general idea of your stirrup length, but everyone has different proportioned arms and legs so you still may need the stirrups adjusted after you mount.
Getting Onto The Horse

Now that you had the tack safety check it’s time to mount up. You will either get on from the ground or use a mounting block (like a set of stairs, 2-3 steps). It is kinder on the horse’s back to mount from a mounting block.
But it is also good to know how to mount from the ground. I believe it is best to mount from a mounting block before learning to mount from the ground. Not everyone will agree.
This is because you’ve never done this before and it is going to be awkward at first until you have enough practice. The horse will feel more comfortable with you getting on from the mounting block. Once you can mount easily and carefully from the mounting block then you will be ready to mount from the ground.
When you are able to mount from the ground decently. It is best you stick with the mounting block for the horse’s sake.
After getting on the horse, your instructor will check the girth again that it is still tight enough as well as double check your stirrup length. Then they will go over your position in the saddle.
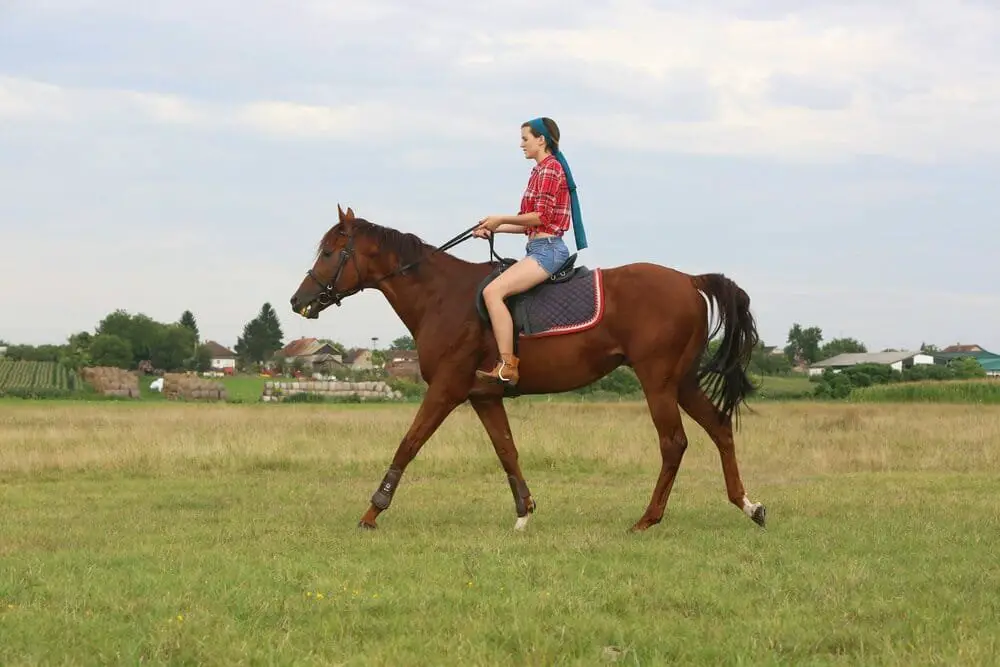
Learning To Ride The Horse

Depending on your instructor there are different scenarios of what may happen next.
- You may be led around on the horse to get used to the motion of the horse, work on your balance, as well as to relax and let go of tension.
- You may be put on a lunge line (a long rope where the horse goes around the instructor in a circle. The instructor is in control of the horse) to get comfortable on the horse and learn to move with the horse’s movement, relax and work on your riding position and balance.
- Your instructor may explain how to ask the horse to walk, stop and turn while you are at the halt. Then have you practice walking and stopping the horse as well as walking and directing your horse where to go.
If the instructor thinks that you are doing well and are ready they may let you experience your first trot. If you do trot you may be taught about posting to the trot or they may have you sit and hold the front of the saddle for your first trot.
But like I said before not every barn will let you trot in the first lesson. There is a lot that can be done and practiced during the time in the walk.
You may practice exercises in the halt and walk such as:
- Standing in the saddle
- Posting at the walk
- Taking feet in and out of the stirrups
- Jumping position (also called half seat and two-point)
- Reaching for horses ears and tail
- Touching your toes
- Arms out to the side
All these exercises would be done with someone holding onto the horse if you are going to be doing them.
Keep in mind that there may be many terms you don’t understand. The equine world has a whole new set of vocabulary that you’ll need to learn. But don’t fear to ask questions. It is better to ask and come to understand than it is to pretend you know what your instructor is talking about.
At the end of your ride, your instructor will have you come to the center of the arena where you will dismount. Before you get off your instructor may talk about the lesson and ask you some questions or review the lesson. They may ask what was the most difficult, if you had any improvements in the lesson, what you need to work on. Your instructor may even give you some homework. Then time to dismount.
Make sure you take both feet out of the stirrups, careful not to kick the horse when you swing your leg behind you and slide down the side of the horse. Don’t jump as this can startle the horse and cause you to lose your balance when you land. Make sure you hold the front of the saddle until your feet hit the ground and keep a bend in your knees landing on the balls of your feet.
9 Horse Riding Tips For Your First Time
- Land as softly as you can when mounting. Think of breathing in as you go up and exhaling and you sink down into the saddle. Let your thigh catch your weight after swinging your leg over the horse.
- Think of always using soft fluid movements with the reins. Avoid jerking, yanking, abrupt movement. Use the amount of pressure needed for a response. Give the horse a chance to respond to a light pressure first. Release pressure as soon as the horse responds.
- Look where you are going. The horse can feel your weight shifts in your seat and looking where you are going helps the horse to go in that direction. Make sure you stay centered and even on both sides, not leaning side to side or too far forward or backward.
- For moving the horse forward, think of your legs as the gas pedal. Squeezing your calves means to go forward. Release when the horse responds. If the horse does not respond use a progression of pressure with your legs. Always start with the lightest pressure. And progressively get stronger with your leg. Instead of one hard squeeze think of squeezes and releases and again as soon as the horse responds relax your legs.
- When your horse responds to your commands make sure you praise the horse with a “good boy” or “good girl”, every so often. Horses like positive reinforcement.
- Separate the movement of your hips from your torso. Think of your upper body being stable by using your core muscles but let your hips are loose and free to move along with the horse’s movement.
- For english riding, don’t hold the reins too high or too low. You want a straight line from the horse’s mouth to your elbow. Shorten your reins a little bit if there is a large sag.
- You will notice the horses head bob up and down, forward and back. Let your hands follow the motion of your horse’s head when you are walking, so you don’t accidentally bump them in the mouth every time his head goes down.
- If you feel like you are getting tense, begin to focus on your breathing. Deep breaths to release the tension in your body. Think of your tense muscles relaxing every time you exhale, but keeping your core strong.
After Riding The Horse

When you get off your horse you may feel a bit wobbling. Especially if you are not fit and don’t have a regular exercise routine. Thank your horse for the ride with a rub and a “good boy” or “good girl.”
Your ride may or may not be done at this point. For my lessons, I would have the student help with the aftercare of the horse. The horse would be brought back to the barn and tied up again. The tack would come off. If the horse is very sweaty then I would show the student how to give the horse a hose down or bathe. If the horse is only a little sweat under the saddle or the girth then the horse would get a good grooming.
At this time if the horse had just been walking around they are probably not going to be super sweaty unless it is hot outside.
The horse gets a treat after the lesson in a bucket not by hand. Then the horse gets put in their stall or gets turned out. Finally, the tack will be put away in the correct spots. Some barns will also have you clean the tack after every ride. Now you have reached the end of your lesson.
Future Horse Riding Lessons
If you decide to continue to pursue riding, most riding lesson programs have you take weekly lessons.
Over time when you become familiar with handling the horse, grooming, and tacking, you will be required to get ready on your own before the lesson.
So the full lesson time will be riding. You will be responsible for caring for the horse after the ride.
FAQS For Your First Horse Riding Lesson
How many horse riding lessons do I need?
First, you need to know what your goals are for riding lessons.
Do you just want to learn how to balance and ride a horse at the walk and trot?
Do you want to compete?
Do you want to own a horse someday?
Do you want this to be a regular hobby?
Do you want to become a horse trainer?
Do you want to learn to jump?
For many equestrians, riding becomes a lifelong passion. You can always improve and learn something new. I took lessons weekly for over 15 years and still take them as I am able to.
Even Olympic riders have instructors or coaches. Sometimes you outgrow what an instructor can teach you. Then if you want to continue to progress forward, you need to find an instructor that has the experience and teaching know-how to help you to advance.
How long does it take to get good at horseback riding?
How quickly a rider progresses depends on the individual.
Factors that affect how long it takes to get good at horseback riding:
Athletic ability
Flexibility
Mental focus
Determination
Feel
Mind blocks
Experience of horses
Instructors teaching ability
What does good at horseback riding mean to you?
This also depends on what you mean by good at horseback riding because different people will have different opinions on what is good horseback riding.
Move and ride in harmony with the horse
Upper-level event rider
A solid foundation of riding
Grand Prix dressage rider
Western reining champion
Able to train a green horse
How often should you have horse riding lessons?
Riding a minimum of once a week is ideal but riding more often will help you progress more quickly.
Check out my blog post How Often Should I Take Horseback Riding Lessons? To help you figure out how often to take lessons based on your situation.
How hard is it to ride a horse?
It is not easy to ride a horse because of many things you need to do at the same time.
You need to keep your balance, while moving your hips with the horse, keeping your riding position, and have control over your seat, hands and legs separately for signalling to the horse.
Then you have to be aware of any imbalances in the horse such as how the horse is feeling emotionally and physically. I have a blog post all about the difficulty of riding horses called Is It East To Ride A Horse?
What horse riding feels like?
There are different feelings when it comes to horse riding. Some of the physical feelings you will have is feeling the horses back and barrel move in time with the legs.
Each gait (type of movement of the horse) feels a bit different. And some horses have smoother gaits than others depending on their body conformation (The way the horses bones are put together.)
The walk feels forward and back and side to side. You may also feel a drop in your hip as that hind leg lifts and comes forward. The walk is fairly smooth.
The trot is a fast forward and back motion with a quick lift. This feels more like bouncing on a yoga ball, alternating hips moving forward every bounce.
The canter also has a lift and feels more like a rocking motion. Like making a backwards circle with your pelvis.
Riding feels like exercise, you need to have muscle tone, endurance and flexibility. If you are out of shape and doing more than the walk you will most likely be huffing and puffing and feeling your muscles being worked in your legs.
Horse riding can cause all sorts of feelings for the rider emotionally, such as excitement, happiness, anxiety, relaxation, frustration, confidence, joy.
What is a beginner horse rider?
I like to look at horse riders as more than just beginner, intermediate or advanced. For a beginner rider you may be a beginner beginner, intermediate beginner or an advanced beginner.
Beginner beginner– A rider who has never ridden a horse or has only ridden a few times, may have trotted before. They’re knowledge is minimal including how to handle, groom, tack up and care for horses. Usually unbalanced at more than a walk. Mostly comfortable at the walk.
Intermediate beginner– Can walk and do the posting trot with confidence. Position may have some flaws but balance is decent at the walk and trot. May struggle getting a “lazy horse”(more like a horse desensitized to the aids) moving forward. Rider may be able to walk trot over ground poles in jumping position. Rider may be getting ready to learn how to canter. Rider may have gone on guided trail rides. Rider is able to groom, handle and tack up the horse with assistance if needed.
Advanced beginner– Can walk, trot and canter. Might struggle a little bit with sitting the trot and canter, without bouncing. Rider may lose stirrups occasionally. Rider may be jumping cross rails, easy gymnastics or small courses. Rider’s position still needs a good bit of work but starting to sit taller, heels are a bit more weighted, but shouldn’t be jammed down. Cantering may cause anxiousness or excitement.
What are the stages of horse riding?
Though there are no set standards all equestrians follow. Though different equestrian sports organizations have standardized levels. Pony Club has rated levels for example.
But here is my best explanation of the stages of a rider’s skills based on Tim Hayes explanation which you can check out here. He calls it the four stages of competence. I found this a few years ago and thought he had a good explanation of the riders journey in stages.
My explanation may be a little bit different than what he wrote, but this is how I understand it.
Stage 1: Rider is lacking in skills, hinders horse and is unaware of this.
Stage 2: Rider is lacking in skills, hinders horse and is aware of the skills lacking, but doesn’t execute corrections for whatever reason.
Stage 3: Rider has developed skills, does not hinder the horse and is actively thinking about what they are doing and how the horse is being affected.
Stage 4: Rider is very skilled and correct, can positively influence the horse, and doesn’t have to think about it. Actions are almost instinctive at this point.
You can be in different stages for different parts of your horsemanship and riding journey. When you learn a new skill you might be at stage 1, for example learning to canter, but another skill you can be at stage 2 or 3 for example posting trot.
Good luck with your first horseback riding lesson. Here is your FREE PRINTABLE CHECKLIST so you don’t forget anything for your first lesson.
Remember to breathe if you get nervous. You are going to have so much fun!
Cheers, Kacey