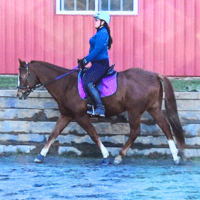
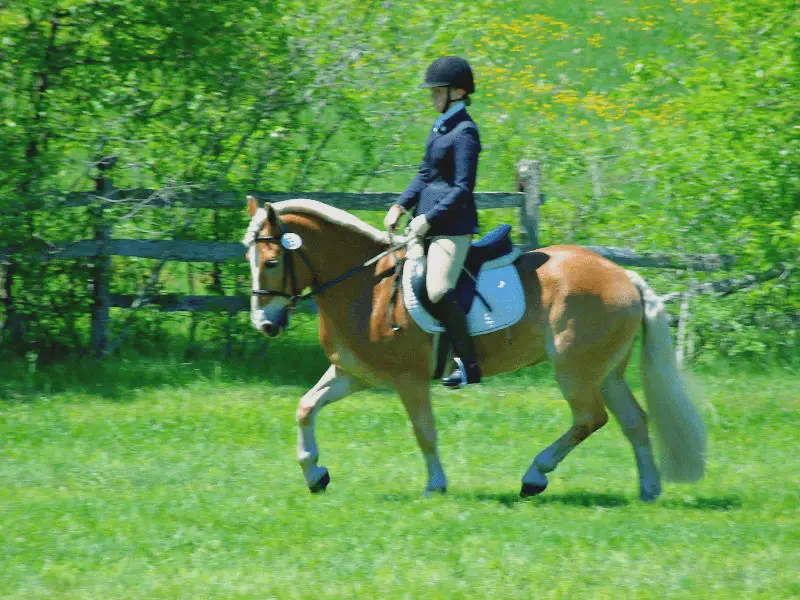
Learn all the basics of how to ride a horse step by step with this beginner’s guide and make sure when you do practice that you’re taking lessons with a qualified instructor. This guide will get you far ahead of the game, but safety with horses is number one after all you will be working with a 1,000-pound animal and you want to make sure your horse riding journey starts on the right track.
It takes time to learn everything and get good with horses so expect to make a lot of horse riding mistakes and struggle in the beginning. With practice horseback riding will get easier over time.
Some new riders learn and progress easier and faster than others. (I was the awkward slow learning rider so many years ago.)
It may feel like you will never get better but don’t despair you will improve if you keep at it and the horses will thank you as you start riding better.
Don’t try and rush, just enjoy the journey and remember these are animals that have feelings, good days and bad days, likes and dislikes. They are also prey animals and can be a little skittish, needing your patience and reassurance.
Every horse you ride will be different. Whether a little different than the last horse you rode or very different than the last horse you rode.
When you ride horses you do more than just ride. You need to get the horse ready to ride and then care for the horse after your ride.
However today we are just going to cover the technical aspects of riding.
Horse Riding Terminology
| Horse Riding Terms | Description |
| Arena, School | An area where horses are ridden which is often enclosed. |
| Indoor | A riding arena inside a building. |
| Outdoor | A riding arena that is outdoors. |
| Go Around The School | Ride around the edge of the arena, known as the track, rail, and path. |
| Aids | In the horse world, this means the signals you give to the horse while riding, to ask the horse to do something. |
| Natural Aids | These aids are your hands, seat, legs, and sometimes voice. Voice is usually a reinforcement aid as needed. |
| Artificial Aids | These are crops, dressage whips, and spurs. They need to be used with tact or you can easily hurt a horse if you are not careful. Spurs are never recommended for beginners who are still learning to control their leg position. |
| Gaits | The movements of the horse. Basic gaits of the horse are walk, trot, canter, and gallop. |
| Contact | Feeling the horse’s mouth from the bit through the reins to your hands. This is mostly done in english riding. Or if in hackamore feeling the horse’s head through the reins to your hands. |
| Tack | This is the name for all the equipment you put on the horse for riding. |
| Saddle | This is what is on the horse’s back that you sit on. It can be a western saddle or english saddle. |
| Stirrups | The things that you rest the balls of your feet on while in the saddle. |
| Stirrup leather | The leather pieces the stirrups go through that attaches to the saddle. |
| Girth | The belt that keeps the saddle on. |
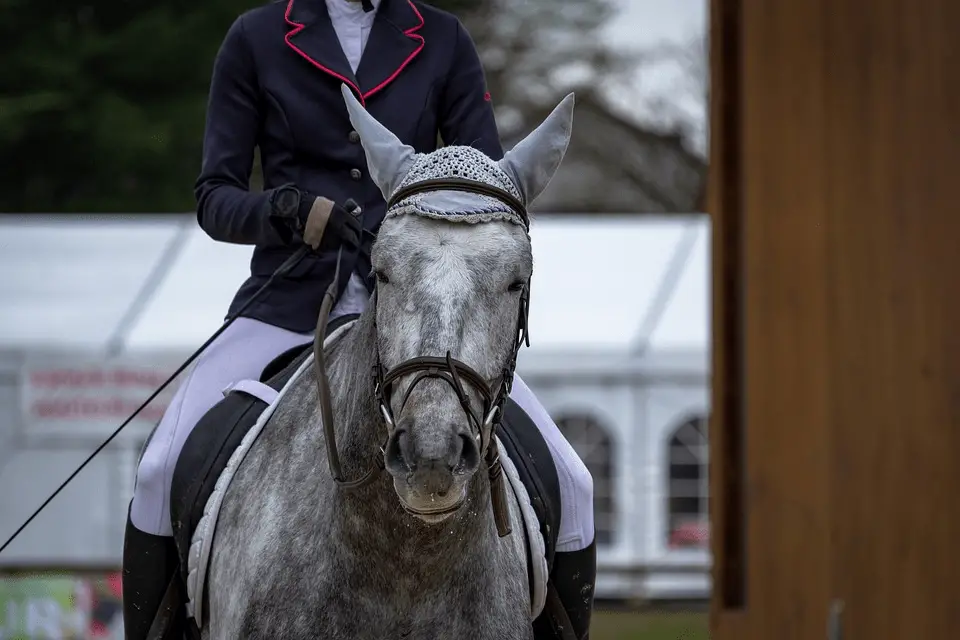
| Bridle | The bridle is what is on the horse’s head while you are riding. It has a bit that goes into the horse’s mouth which the reins are attached to. |
| Bit | Metal pieces in the horse’s mouth used to communicate to the horse from your hands to the reins which puts pressure on the bit. |
| Hackamore | Like a bridle but has no bit. It uses pressure from the reins in different areas. The nose, the poll and under the chin. |
| Poll | The boney area between and right behind the horses ears. |
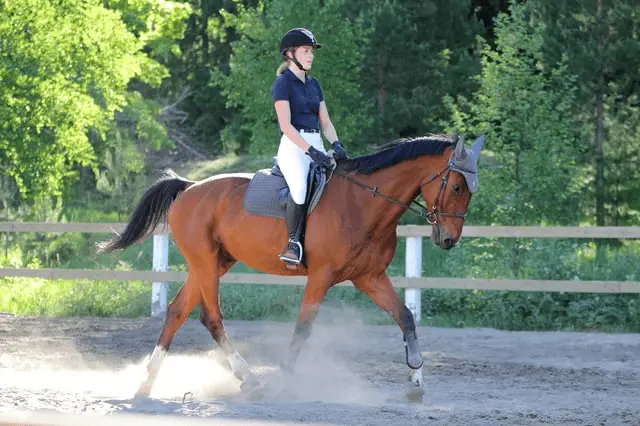
| Trot | A bouncy movement the horse makes with the horses legs moving in diagonal pairs. It is the next speed up from the walk. Although trot can be ridden at different speeds. |
| Canter | Smoother than the trot but still can have a bounce. The horses legs move in a 3 beat rhythm. And move more like a rocking horse. |
| Posting Trot | When you rise forward with your hips out of the saddle and back down touching the saddle in time with the horse’s movement in the trot. Like a metronome. |
| Reverse | This is when you change directions by turning the horse toward the middle of the arena and right back to the rail in the new direction. |
| Rail, Track, Path | This refers to the edge of the arena going around the whole school. |
| Inside | This is the side of the horse that is closer to the middle of the area. |
| Outside | This is the side of the horse that is closer to the wall, fence, or outside of the arena. |
| Half seat | This is a riding position. You bend forward from your seat bones, keeping your back straight. Weight comes off your seat and into your thighs and heels. |
| Poles | They are the horizontal poles used for horse jumps. They can also be placed on the ground and ridden over at the walk trot or canter, depending how they are set up. |
How To Check The Tack Before You Mount
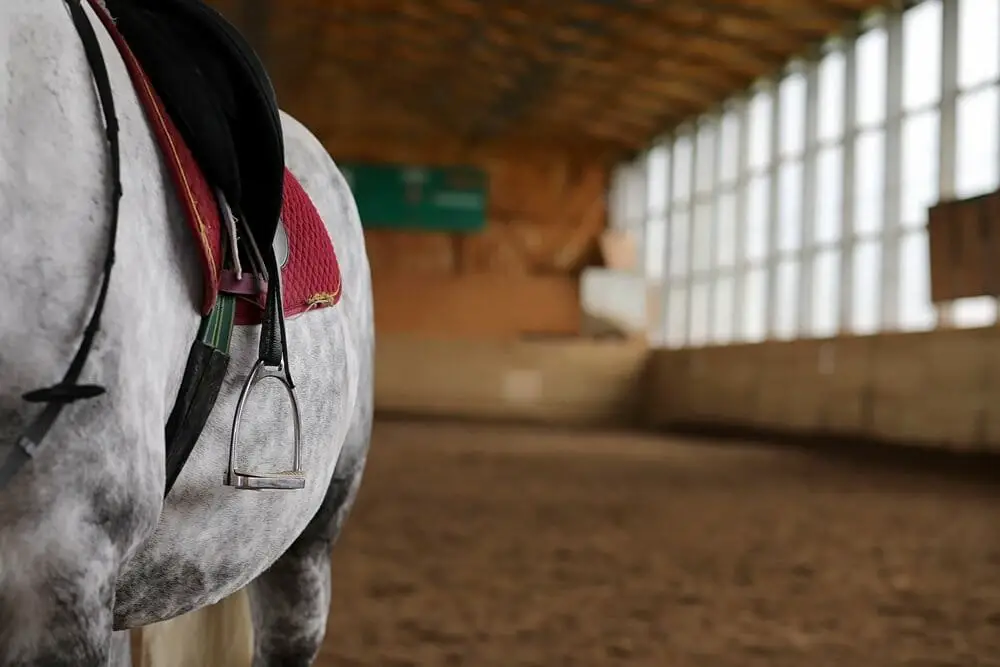
You want to make sure that you look over the horse’s tack before you get on. Normally riders check that the girth is tight before they mount so that the saddle is secure and won’t slide down.
However, there are other places that should be checked before getting on to ride.
Places To Look Over The Tack Before Mounting
This is called a tack safety check and you should do it before every ride.
- Bridle pieces are buckled and all straps are in the keepers and not flapping around.
- The saddle is sitting on the right spot on the horse’s back.
- The saddle pad is pulled up into the pommel of the saddle so it’s not putting pressure on the withers.
- The bit is not too low or high in the horse’s mouth.
- The noseband can fit two fingers underneath against a horse’s face.
- The throat latch fits your fist underneath.
- All leather straps look in good condition and don’t look like they may break.
- Make sure your helmet is properly strapped on.
Checking the tack before you ride is for your safety and the horses. If anything looks iffy make sure you tell your riding instructor, it could prevent a potential riding accident.
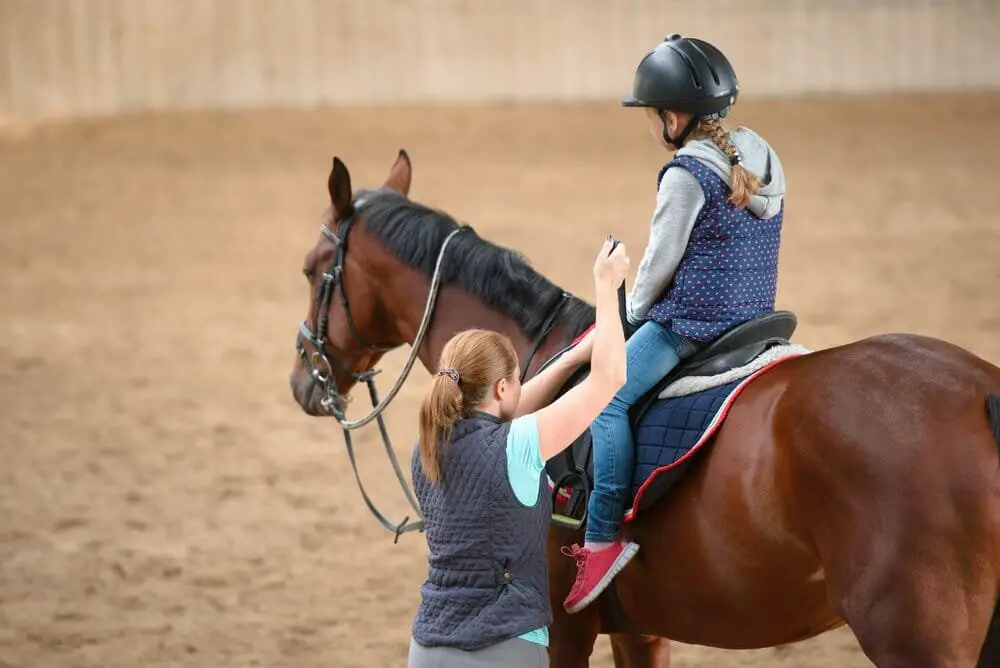
How To Mount The Horse
It’s good to know how to mount a horse from the ground and you should be able to do it. If you can’t mount a horse properly from the ground then you may not be in shape enough for riding. If you are short and the horse is really tall for you, it may be you need a mounting block of some kind.
This being said I can mount from the ground but I prefer to use a mounting block. When you mount it twists the saddle on the horses back. Using a mounting block you are closer to getting your leg over the saddle and there is less twisting of the saddle on the horse’s back. It helps prevent soreness in the horses back.
However if you are too heavy for the horse or the saddle doesn’t fit properly, then using a mounting block can only help so much.
I created a video a few years back to demonstrate the two ways to mount a horse, from the ground and a mounting block.
Also a tip, make sure you put your left foot in the stirrup when mounting or you may find yourself facing the horses rear when you get on.
Video: How To Mount
How To Dismount The Horse
At the end of your ride when you are ready to get off the horse you want to bring the horse toward the center of the arena away from the wall. So you have plenty of space to dismount, and you are away from other horses and riders.
You want the horse fully halted and standing still. Here is a video I created also a few years old demonstrating the dismount.
Also after you dismount from the horse if you are riding english make sure that you run the stirrups up and loosen the girth a couple holes, all while keeping a hand on the reins in case the horse starts to move off.
Video: How To Dismount
Adjusting Your Stirrups
The stirrup length is how long the stirrup straps are that are connected to the stirrups, basically where the stirrups fall below the saddle on the horses sides. Your stirrups can be too long or too short. It will make it hard for you to balance in the saddle if your stirrups are not the right length for your leg length and the horse’s width.
Generally when you start riding you may ride with slightly shorter stirrups than a more experienced rider. It gives you a little extra security.
You can get the stirrups at your general length from the ground before you even get on the horse.
| How To Find Your Basic Stirrup Length From The Ground | |
| Step 1 | You do this by making a fist and straightening your arm. |
| Step 2 | Put your fist on the buckle of the stirrup leather under the little flap. |
| Step 3 | Bring the bottom of your stirrup iron to your armpit. |
| Step 4 | Check the length if it doesn’t reach it is too short. |
| Step 5 | The stirrup leathers have holes. Pull the buckle and strap down and go down several holes until the stirrup reaches your armpit. |
| Step 6 | If it is too long go up some holes until it reaches your armpit. |
| Step 7 | Once the leather is taut with your fist on the buckle and the bottom of the stirrup is reaching your armpit, then you have your basic stirrup length set. |
However here’s the thing. This is only a general guide. If the horse is wide you may need to bring the stirrups down a hole or two. If the horse is narrow then you may have to go up a hole or two.
The other problem is some people have short legs and long arms, or long legs and short arms. This method works best with people that are proportionate in arm and leg length.
But it will still give you a good basic stirrup length to get started with. After you get on the horse you can check the stirrup length and adjust while you are on the horse. Doing it from the ground first just means that there may be less adjusting of holes when you are on the horse.
With your legs out of the stirrups hanging down you want the bottom of the stirrup to be at your ankle bone or slightly above.
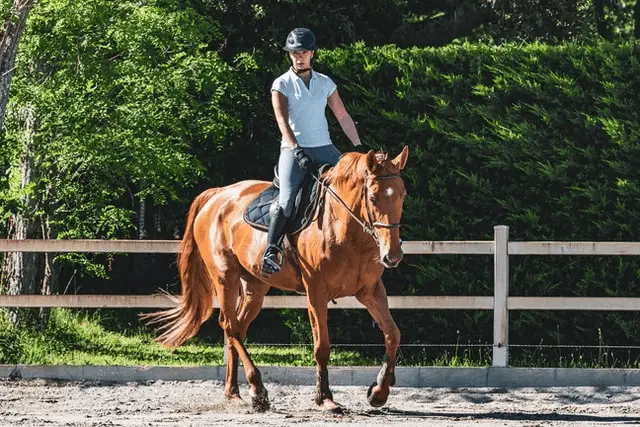
Your Balanced Riding Position
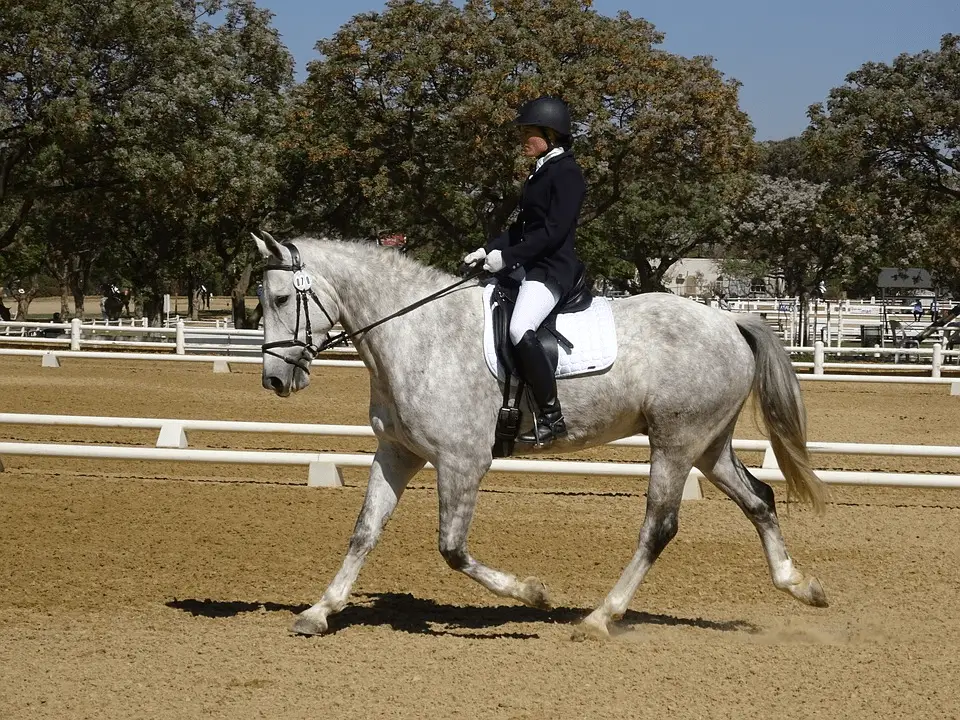
Riding position is the way that you sit in the saddle, your posture, your leg position under your seat. Riding position is lining your body up like building blocks. This will help you balance while the horse is in motion and is optimizing your weight distribution, for the horse and yourself.
Lining Up The Building Blocks For A Balanced Riding Position:
- Your ears over your shoulders.
- Your shoulders over your hips.
- Your hips over your heels.
Over all you want these building blocks to balance over each other.
However there are times and positions where you will move out of this upright position, some which will be discussed later in this guide.
Such as:
- Half Seat/ 2 Point/ Jumping/ Cross country seat/ Light Seat/ Galloping Position
- Jockey/ Racing Seat (We won’t be going over this one)
- Posting Trot
Arm and hand position will be discussed in the How To Hold The Reins section.
Moving With The Horse
Although you will try to maintain your riding position you don’t want to be rigid and tense throughout your whole body.
When the horse moves there is a lot of motion going on up and down side to side, diagonally, and you need to absorb that motion in your body, without your upper body wobbling around or your legs swinging back and forth.
In order to do this you need to have tightened muscles in certain places and supple loose muscles and joints in other places.
If you are tight over all trying to hold your riding position. You will bounce and go against the horse’s motion instead of moving with the horse’s motion.
If you are loose and relaxed all over then you’ll be slouching, you are going to sway every which way, be put off balance, and make it hard for the horse to carry you as well as stay in motion with the horse. You may find yourself getting left behind the motion often.
This is why you want a mixture of tightness and looseness in the right areas of your body at the right times, to move in harmony with the horse and to apply aids to the horse.
How To Hold The Reins
| Step 1 | Lay the reins down on the horse’s neck with the buckle in the middle. |
| Step 2 | Put your hands on the reins of either side of the buckle with palms facing down and thumbs pointing toward each other. |
| Step 3 | Lift your hands holding the reins and turn your hands so that your thumbs are on top and pinkies are toward the ground. |
| Step 4 | Wrap your pinky fingers around the reins so that the reins are between your ring finger and pinky. |
| Step 5 | Close your hands in a gentle fist with your thumbs down on top of the reins. |
How To Shorten and Lengthen The Reins
Shortening Your Reins:
| Step 1 | In order to shorten your reins take one hand say your right hand still holding the right rein also pinch the end of the left rein. |
| Step 2 | Then slide the left hand down the left rein to shorten. |
| Step 3 | After shortening the right rein by using your left hand holding the left rein pinch the end of the right rein. |
| Step 4 | Slide your right hand down the right rein. |
Lengthening Your Reins:
To lengthen your reins open your fingers enough to let the reins slide through your fingers and loosen.
If your reins are too long you will have no control, unless the horse has been trained to be ridden on a long rein, with seat, legs and neck reining, often used in western riding.
If your reins are too short it will be uncomfortable for the horse’s mouth and may feel like you are constantly pulling on the horse’s mouth.
The Rein Contact
I mentioned what rein contact is in riding terms and will repeat here.
“Feeling the horse’s mouth lightly from the bit through the reins to your hands. This is mostly done in english riding. Or If in bitless feeling the horse’s head through the reins to your hands.”
It shouldn’t feel like you are pulling back on the reins to have contact. If so your reins may be too short.
Hand and Arm Position
Your hands should be over the horse’s withers and your elbows bend.
You want the reins short enough so that you have a light contact with the horse’s mouth. The horse’s head moves while you ride so it will take practice to keep the contact consistent and follow the horse’s head motion.
Just be careful not to jerk the horse on the mouth with your hands or use the reins for balance.
Riding Aids To Communicate With The Horse
We can’t just talk to the horses and have them know what we are saying, so riders use another means of communication “Riding Aids.” Although horses can be trained to voice commands like a dog or other animals can.
The aids are the signals to the horse that are used to communicate to the horse, to help them understand what you are asking them to do.
These signals come from your hands, legs, seat and sometimes your voice. Horses are trained to listen to certain signals, so as a rider you need to learn how to apply these signals clearly and not confuse the horse.
The Natural Aids
Seat
The horse can feel the weight of your seat through the saddle. When you sit deeper in the saddle and still your seat this tells the horse to slow down or stop. When put more weight on one seat bone it tells the horse to turn in that direction.
Legs
A short squeeze of both calf muscles or a nudge of the heels if the horse doesn’t respond to the calves at first means to go forward.
When you use one calf on the horse’s side it can mean a couple of things, turn away from the leg, or tell the horse not to drift or lean in that direction.
Hands
You always want to be smooth and as gentle as possible. The reins are attached to a metal bit in the horse’s mouth which is sensitive.
To slow down or stop slowly pull back until you feel light pressure, then squeeze and release the reins with your hands as if you are wringing out a wet sponge. As soon as the horse slows or stops make sure you immediately release the pressure.
Voice
You shouldn’t just use voice commands to ask the horse to do something. The voice commands are only meant to reinforce the signals or aids you are communicating to the horse.
Also a low calm, “easy” can help calm a nervous horse. “Clucking or kissing” can help the horse to understand you want them to go forward. When you are asking for a gait transition you may use the name of the gait.
For example from walk to trot you may say “Trot.” Or if you are going from a walk to halt, you may say “whoa.”
Artificial Aids
Crop and Whip
The crop is a short stick often used for horses that are lazy to the legs and aren’t responding to move forward. Often because horses have become dull to the leg aids from being squeezed or kicked too much and learned to just ignore the signal.
The crop is easier to hold compared to the longer dressage whip which you’re more likely as a beginner to tap the horse accidentally. Crops and whips can hurt the horse if they are used hard enough and should never ever be used as punishment.
These are meant to be reinforcements to the natural aids, usually for moving forward but sometimes with the dressage whip for moving sideways as well.
Try hitting yourself with a crop or whip. If it hurts you it will hurt the horse. So if you use one, never use it hard enough that it will hurt the horse, it should be more of an extension of your arm.
If the horse or pony is very unresponsive then they may need to go back in training and work on becoming more sensitized.
Spurs
Spurs are also meant to be for reinforcement of the aids as well as refinement of the aids. Meaning you can be a lot more subtle and softer when applying leg signals. And spurs are the backup aid from the calves.
Beginners should not use spurs, most people shouldn’t wear spurs. You need a super controlled leg and ankle. Your toes must be pointing forward so that the spur isn’t accidentally bumping the horse in the sides every stride.
You need to be able to control the turning of your foot to apply the spur and not apply too much pressure. Contrary to belief spurs should not be used for lazy horses, but well-trained horses, as you don’t want to have to apply too much pressure to get the horse to respond but light pressure.
How To Ask The Horse To Walk
| Step 1 | Look ahead where you want to go. |
| Step 2 | Check your reins are short enough so that you have light contact with the horse’s mouth. |
| Step 3 | Squeeze your calves against the horse’s sides to get the horse’s attention. |
| Step 4 | Squeeze a couple of short squeezes to ask the horse to walk. |
| Step 5 | Let your hands go forward a little and when the horse starts to walk follow forward and back with your hands. |
Moving With The Horse At The Walk
When the horse walks the horse’s head will bob up and down. You want to make sure you follow the movement of the horse’s head with your hands so that you don’t accidentally bump the horse in the mouth with the bit.
Make sure you relax your hips and let them move along with the horse’s movement. The walk is a, 4 beat-gait. The footfalls sound like “1-2-3-4.” The walk is a fairly easy smooth gait to ride.
Directing Where The Horse Goes
Just be careful not to jerk the horse on the mouth with the reins or use the reins for balance.
How To Ask The Horse To Turn
| Step 1 | Look where you want to go. |
| Step 2 | Sit up straight and slightly turn, not lean your seat where you want to go |
| Step 3 | Open your rein (take rein away from the horse’s neck) in the direction you want to go and give squeezes, like on a sponge with the rein to have the horse slightly look in that direction and ease up on the other rein. |
| Step 4 | Squeezes with both legs to keep the horse going. |
| Step 5 | Control the horse’s hind end by bringing the outside leg (leg you are turning away from) back a little bit. |
| Step 6 | After the horse turns go back to center with your hands, legs and seat and allow the horse to continue on. |
Changing Directions In The Arena
You will use your newly found turning skills to change directions. Turning the horse around to go the other direction is called a “reverse.” This is one way you will change directions.
When doing a reverse make sure that you always turn to the inside of the arena and back to the wall as opposed to turning to the wall or the outside to change direction. You are essentially making a teardrop shape with the horse.
Another way to change directions is by riding across the “diagonal.” There are letters around the arena and the instructor may call out the letters to ride toward, in order to change directions on the diagonal. Basically you are creating a diagonal line across the arena to change directions.
Keep The Horse On The Track
It is a common thing for the horse to drift off of the path around the arena or the track. They tend to gravitate toward the middle of the arena where you halt and dismount at the end of the ride. Horses and ponies also like to cut off the corners of the arena because it is easier than riding into the corner.
| How To Keep Horse On The Rail And From Cutting Corners | |
| Step 1 | Look where you want ahead at the rail where you want the horse to go. |
| Step 2 | Use squeezes with your inside calf. |
| Step 3 | Open outside rein toward the rail and apply squeezes on the reins so the horse can feel it through the bit. |
| Step 4 | Bring inside rein against the horse’s neck, but not crossing the rein over the neck. |
| Step 5 | Make sure your leg closer to the rail is light or slightly off the horse’s side. |
How To Ask The Horse To Halt
You may think that all you have to do is pull back on the reins until the horse stops. But there is a little bit more to it than that.
| How To Ask A Horse To Halt | |
| Step 1 | Make sure your calves are relaxed. If you grip with your calves this will confuse the horse and the horse may think you want them to go forward. |
| Step 2 | Keep your upper body straight and squeeze your core muscles to stabilize yourself. |
| Step 3 | Stop your seat from moving freely with the horse’s movement. You can do this by squeezing your butt muscles to resist the movement of the horse but remember to keep your legs relaxed. |
| Step 4 | Pull back on the reins until you feel a steady contact with the horse’s mouth. |
| Step 5 | Hold that contact. Start “sponging the reins” squeezing and releasing with your first, until the horse stops and stands still. |
| Step 6 | As soon as the horse stands still, release the contact with the reins, and relax your seat. |
If the horse walks off before you ask them to, then just be patient and repeat the process to bring the horse back to a halt.
How To Ask The Horse To Trot
When you are just learning to ride you may start the trot, with someone leading the horse from the ground or on the lunge line. So that you don’t have to worry about trying to balance yourself and stay on while also trying to control where the horse goes.
You most likely will have your reins taken away so you don’t accidentally use the reins for balancing yourself or jerk the horse in the mouth if you lose your balance.
Asking the horse to trot is very similar to asking a horse to walk from the horse. But the trot is much bouncier than the walk because it has a spring-like movement where the horse gets a moment of air time between each stride.
| How To Ask Horse To Trot | |
| Step 1 | Make sure your reins are at the appropriate length so that you will be able to direct the horse where to go and slow down if need be. |
| Step 2 | Look where you are going. |
| Step 3 | Bring your hands forward slightly, so the horse doesn’t feel like you are holding them back. |
| Step 4 | Give a squeeze of your calves to alert the horse that you are going to ask them to trot. |
| Step 5 | Lean forward only a very tiny bit so it is almost unnoticeable if anyone was watching. |
| Step 6 | Squeeze and release with your calves and increase the strength of the squeezes until the horse goes into the trot. |
| Step 7 | You can cluck or say trot as a reinforcement to go forward. |
| Step 8 | As soon as the horse trots you can relax and do sitting trot or posting trot. |
If the horse is still not responding. Nudge with your heels, still clucking. Lastly, kick with your heels. The moment the horse trots relax your legs and remove the pressure.
After a couple of strides, give a few more squeezes to let the horse know to keep trotting. Then you can relax again.
Any time the horse slows down to go back into the walk. Give squeezes with your calves to send the horse back into a more forward trot. Always release the leg pressure when the horse responds.
Moving With The Horse At The Trot
Like I said before the trot is pretty bouncy. Although each horse’s trot will have a different amount of bounce and a different feeling.
All horse’s trots will be 2 beat footfalls. 1-2, 1-2, 1-2.
Their legs move in diagonal pairs at the trot. So left hind and right front will move back and forth together and the right hind left front will move back and forth together.
There are 3 ways you can ride and move with the trot.
- Posting trot
- Sitting trot
- The light seat also known as half seat, jumping position, galloping position, 2 point and there may be more names for it.
Posting Trot
This is when you rise and sit in rhythm with the trot’s two-beat gait. Up for one and down for one. However, it is not simply standing and sitting in the saddle.
If you stand and sit in the saddle it will cause your lower leg to swing, you will lose your balance and you will more than likely slam down on the horses back.
For the posting trot, it is more of an up and forward rise and a controlled sit. You rotate around your knee in the posting trot with your calves still. In order to do this, you don’t just put all your weight in the stirrups to stand. You can post with no stirrups. This gives you a good idea of what muscles are involved in the posting trot.
When you rise you utilize the spring of the horse’s movement to help propel your hips/seat up and forward. You will also be using your inner thigh and your seat muscles to bring your seat up and forward.
So your seat is rolling toward the front out of the saddle slightly and when sitting back down the seat sinks back and down into the saddle lightly. When your feet are in the stirrups, as you rise some of the weight can sink into your heels. Make sure your ankles stay supple and springy, to absorb shock.
You want to feel like you are in sync with the horse’s rhythm and moving as one with the horse’s movement.
In posting trot your upper body stays slightly… only slightly forward. Otherwise if you are sitting straight you will get left behind the motion.
You also want to make sure that your leg is positioned so that your ankle is underneath your hips. If your ankle is in front of your hips this will also cause you to get left behind the motion.
Getting left behind the motion feels like losing your balance and falling backwards a lot. Which means smacking down on the horses back. You will have more control over your seat with your leg positioned correctly understand
Sitting Trot

The sitting trot is harder than the posting trot. Your seat should stay in the saddle and absorb the motion in your body, so it looks like you are in harmony with the horse’s movement.
To sit the trot you may think you just sit there and try to relax but you actually need to move your body a good bit.
You move your hips in time with the horse’s hind legs and with the lift. You move your hips a lot which is similar to belly dancing but with the motion of the horses back.
You keep your core tight and allow your hips to open and close with the motion as well. I like to think of every stride making a backward circle with my pelvis to help move with the motion. This imagery may work well for you, but often different imagery may work for you as no one person is exactly the same.
Sitting trot is used often in western riding, higher levels of dressage, and schooling of the horse.
Half Seat At The Trot

This is a forward position that is used for different reasons.
Half seat can be used for:
- Letting the horses back warm up at the trot.
- Building up your leg strength
- Trotting over ground poles
- Jumping from the trot
When you are in half seat your seat comes out of the saddle and hovers over the middle of the saddle. Your weight goes down your thigh and knees as well as down your heels.
You want to use your hip, knee, and ankle joints as springs and shock absorbers when trotting in half seat.
Your seat will slide back slightly as your shoulders come forward.
In half seat your head balances over your shoulders, and your shoulders over your knees and your knees over the balls of your feet.
How To Ask The Horse To Walk From The Trot
If you are riding at the trot and you want the horse to walk follow these steps.
| How To Ask Horse To Walk From The Trot | |
| Step 1 | Prepare the horse for the transition, by checking your reins are even and they haven’t slid through your fingers. |
| Step 2 | Sit deep into the saddle, moving your hips with the motions of the horse as if in sitting trot, keeping your legs draped around the horse but relaxed. |
| Step 3 | Hold contact on the reins and give several squeezes with your fists asking the horse to come down to a walk. |
| Step 4 | You can reinforce the aids with the voice command walk. Low and calmly. |
| Step 5 | As soon as the horse comes down to a walk, release the pressure on the reins and relax, moving your hips and hands with the horse’s movement at the walk. |
How To Ask The Horse To Canter

The canter is a 3 beat gait and the horse moves similarly to a rocking horse. 1-2-3… 1-2-3… 1-2-3. Each direction of the canter has a leading leg. The right leg leads the canter to the right and the left leg leads the canter to the left.
I wrote a post on How To Effectively Ask Your Horse To Canter. This blog post is for more experienced riders and has a little bit more steps than the basics for a beginner.
| How To Ask A Horse To Canter (For Beginners) | |
| Step 1 | Check that your reins are short enough that you will have control with your hands placed over the horse’s withers. |
| Step 2 | Sit up straight throughout the transition. |
| Step 3 | Start with posting trot and get a good energetic trot that keeps a steady rhythm. |
| Step 4 | Before you ask for the canter, sit the trot, you want to either ask for the canter going into a corner or on a circle that is about 20 meters in diameter. |
| Step 5 | Make sure the trot is relaxed and balanced before asking for the canter. |
| Step 6 | When asking for the canter squeeze both legs, inside leg at the girth and outside leg sliding back behind the girth. |
| Step 7 | If needed reinforce with the voice command “canter.” |
| Step 8 | Relax your hands allowing the horse to canter and follow with your hands. |
Moving With The Horse At The Canter
The canter is faster than the trot and feels very different from the trot and the walk. Typically the canter is smoother than the trot but bouncier than the walk. The horse lifts and drops its head in the canter which is part of the rocking horse feeling.
Now to describe how to move with the horse at the canter. Keep your core muscles tight. This is going to help you stabilize your upper body and keep it straight. Your inside hip will follow the leading leg slightly.
Your seat will move each stride starting at the back of the saddle sliding down and forward to the front of the saddle then an up lift type feeling to the back of the saddle again. So once again it is like the backwards circle motion but in the canter it is slower circles than in the sitting trot.
You need to make sure your legs stay long and they don’t grip and shorten which may cause you to lose your stirrups.
How To Ask The Horse To Trot From The Canter
One thing I think really helps in your downward transition from the canter to trot is to do a long exhale during your transition.
| How To Ask For The Trot From The Canter | |
| Step 1 | Prepare the horse for a downward transition with a couple of squeezes of the reins. |
| Step 2 | Sit deep in the saddle and make sure your legs are relaxed and not gripping. |
| Step 3 | Take up the contact with the reins, and give several squeezes with your fists. |
| Step 4 | If the horse doesn’t go right into the trot try posting into the trot. Sometimes the act of posting in the canter can help bring the horse into the trot. |
| Step 5 | Also, reinforce the aids with the voice command “and trot” in a low calm way. |
If the horse is still not coming down to a trot try bringing the horse onto a smaller and smaller circle as if you are spiraling in and once you get the trot spiral back out.
How To Ask Horse To Circle
To circle a horse you will use the same signals you would use for turning the horse but depending on the size of the circle would determine how much pressure you use with the aids and for how long. Generally the smaller the circle the more you have to keep pressure on to ask the horse to keep turning. The larger the circle the less you will have to use the turning aids.
When I make a circle I find it helps to think of four points like a diamond. Keep the horse’s nose slightly pointing around the circle to the inside. With the worst bending slightly to the inside ride from point to point on the diamond.
This will help you make a more accurate Circle the smaller the circle the smaller the imaginary points on the diamond the bigger the circle the bigger the diamond and the points on the diamond will be further away from each other.
To change direction on a circle ride towards the middle of the circle and then change direction. You will almost make a Yin Yang type of shape.
What Is A Half Halt
A half halt is when you hold the aids momentarily. We can get more advanced into this but I want to keep it basic for now. It is only for a second. You will sit in the saddle, squeeze your calves and hold the contact with a little bit of pressure.
There should never be more rein pressure than leg or seat. Leg pressure should always be more than rein pressure in a half halt.
Half halts are smooth and coordinated and only last half a second to a second. You can do a series of half halts as well as just one quick half halt depending on the situation.
You probably won’t learn about half halts for a while in your riding lessons.
Why Half Halts?
- Helps to rebalance a horse that is off balance or getting off-balanced.
- Prepares a horse for a transition into a new movement, direction or change of some sort.
- Helps to slow a horse down that is moving too fast.
- Helps a horse to lift legs higher and reach further forward with the hind legs.
How To Ask Horse To Back Up
| How To Ask Horse To Back Up | |
| Step 1 | Start at a halt with the horse. |
| Step 2 | Take up equal contact in both reins. |
| Step 3 | Lift your hands up a little bit and put slight pressure on both reins, sponge the reins (squeezes on the reins like wringing out a wet sponge.) |
| Step 4 | Add light pressure with your calves to tell the horse to move. |
| Step 5. | As soon as the horse backs up relax your legs and release the rein pressure immediately. |
5 Beginner Horse Riding Tips
Tip #1
Don’t rush with progressing forward in your riding. Each thing you learn builds upon each other and you want a solid riding foundation, not one with cracks. Besides you can be putting yourself in a more dangerous situation if you are progressing faster than you are ready for.
Tip #2
Don’t be hard on yourself or the horse. Riding will be frustrating at times because the horse doesn’t understand what you are asking, the horse is trying to be the leader, or the horse is having a bad day.
On your side of it, you need to learn to use and control each of your body parts separately, so you are not accidentally confusing the horse with mixed signals, you need to remember so many different things that it can get confusing at time, the instructor can sometimes forget to explain something or didn’t explain things well enough, you may feel anxious sometimes or like you can’t do something.
My advice is to be patient with yourself and the horse, believe you will get it right eventually, ask loads of questions, keep riding, enjoy your time with the horses and soak it in, celebrate the very small wins and know that every mistake and challenge that you are overcoming slowly is making you a better and better rider.
Tip #3
Think of the horse’s best interest. Many times but not always a horse acts badly because they are in pain, such as a sore muscle in their body somewhere. Their whole body is connected so pain in one area can lead to pain in another area. Horses pull muscles just like we do.
The saddle fit and saddle placement is huge in causing horses pain. How we handle and ride horses can build trust or cause pain. Don’t just assume a horse is bad when they act up. Look for sources of pain or fear first. If you think something is off with a horse, maybe they are sick or not feeling well, limping a little bit, really stiff. Don’t ride them.
Aside from arthritis where they may be stiff at first but loosen up and need regular exercise to keep as limber as possible.
Tips #4
Working with horses on the ground and in the saddle. When we ask a horse to do something, we apply pressure. Whether from our hands, legs, seat, voice, whip, a swinging rope whatever.
Make sure you always start with the lightest pressure. Then progress to stronger and stronger pressure until the horse responds. Always release the pressure as soon as the horse responds. When you ask for the same thing or something different start with the lightest pressure once again.
This will help the horse to eventually listen to lighter and lighter pressure over time. If you always ask with heavy pressure the horse will always need heavy pressure. This is how horses became desensitized or dull to our aids.
Tip #5
You may only want to learn the basics of riding and that’s good enough. But if you are wanting to ride horses and do more than a little bit of trot. You really should learn to ride well.
Your riding affects the horses you are on. The better you are able to ride the less confused horses are, the more comfortable the horses are, the happier the horses are, the less accidental abuse you will cause to the horse.
Riding well also will give you confidence in your riding, allow you to have more fun, give you a sense of fulfillment, give you a sense of peace that you are not bothering the horse but in harmony with the horse. Riding is something that you can get good at but it is also something that you can continue to improve on forever.
Think of it as a journey, we all start at the same place, some learn and improve faster than others because we are all different and that is okay.
Bonus Tip
Practice keeping your hands steady for riding by putting your fists against a wall and keeping your hands in the same spot do squats. Think of your elbows opening and closing as you rise and squat.
This will mostly help for the posting trot where your hands stay steady because the horse’s head is not supposed to bob up and down a lot in the trot.
Praying for happy trails on your equestrian journey!
Cheers, Kacey